> ## Documentation Index
> Fetch the complete documentation index at: https://bruno-a6972042-mintlify-c74cb75a.mintlify.site/llms.txt
> Use this file to discover all available pages before exploring further.
# Migrating from Postman
Bruno makes migrating from Postman easy. All you need to do is export your collections and environments and import them to Bruno.
## Collection Export
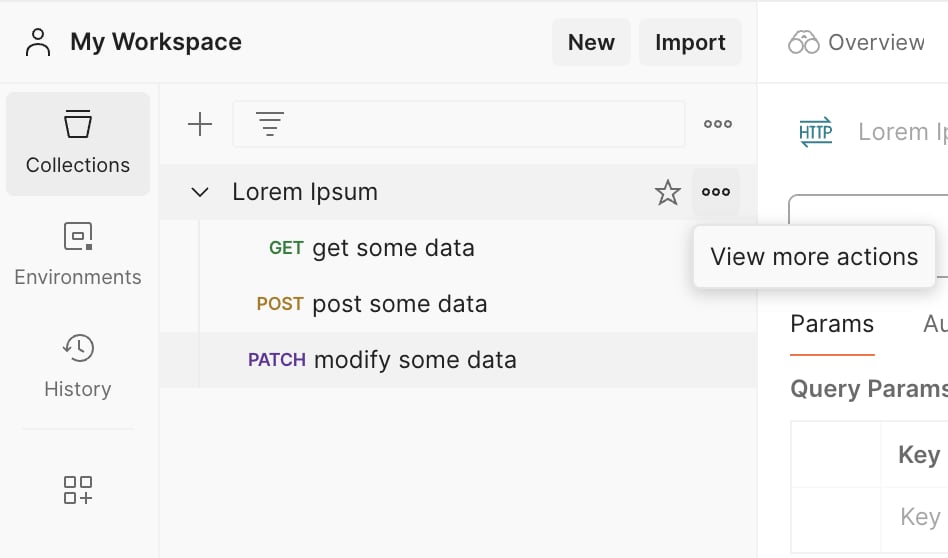
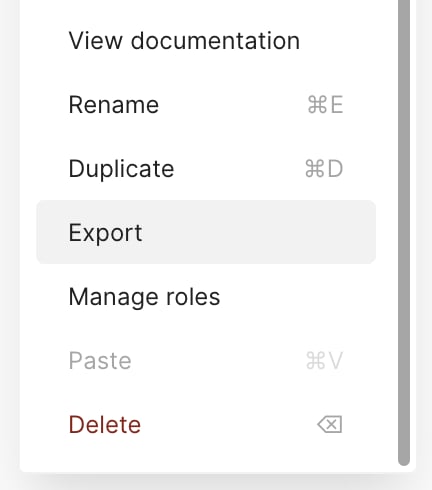
Open Postman and select the collection you want to migrate. Click on the `···` followed by `View more actions` to open the dropdown menu and scroll down until you find `Export`, then click on it.
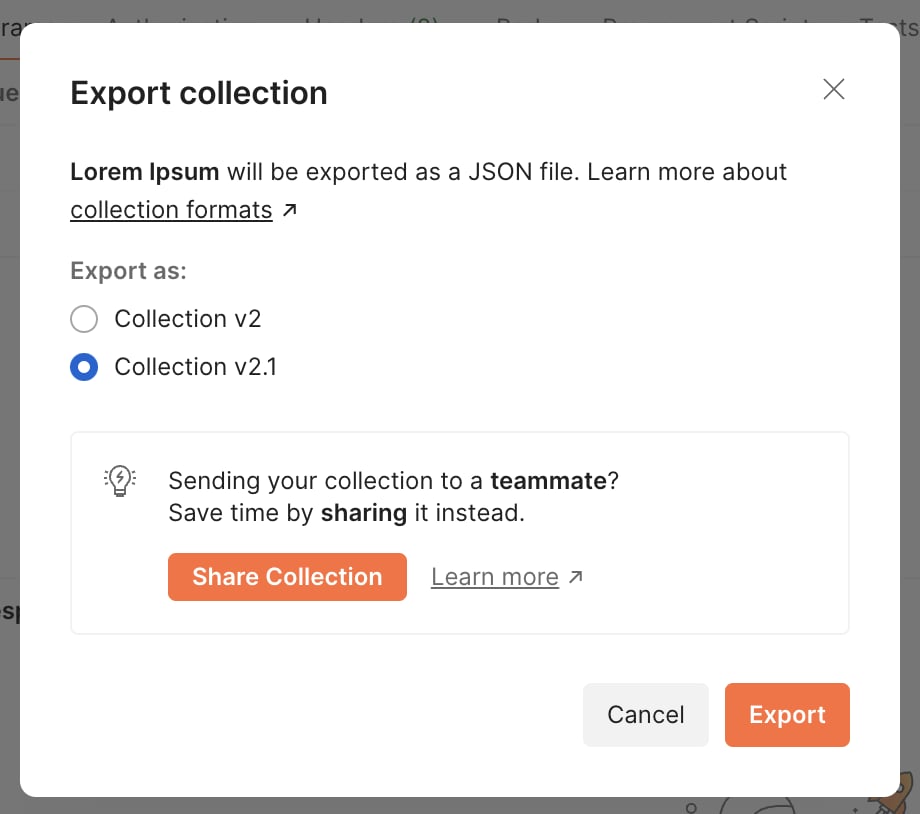
A popup dialog will appear, select either `Collection v2` or `Collection v2.1` format and click on the `Export` button.
The collection will be downloaded as a JSON file.
Now simply follow the instructions for [Importing Collections](/get-started/import-export-data/import-collections) and you're done!
## Export Data Dump
Bulk Import from Postman is included in Bruno Ultimate Edition
You can export a data dump of all your collections and environments in Postman. You can then import the data into any Bruno.
**To [export a data dump ↗](https://learning.postman.com/docs/getting-started/importing-and-exporting/exporting-data/#export-data-dumps), do the following in Postman:**
* Select the settings icon in the header, then select `Settings`.
* Select the Data tab, then select `Request Data Export`.
* Select `Export Data`, then select the data types you want to export. You can export collections, environments, or both.
* Select `Request Data Export`.
**To import your Data Dump to Bruno:**
* Open the import menu and select `Import Collections`
* Select the zip file where the export was saved
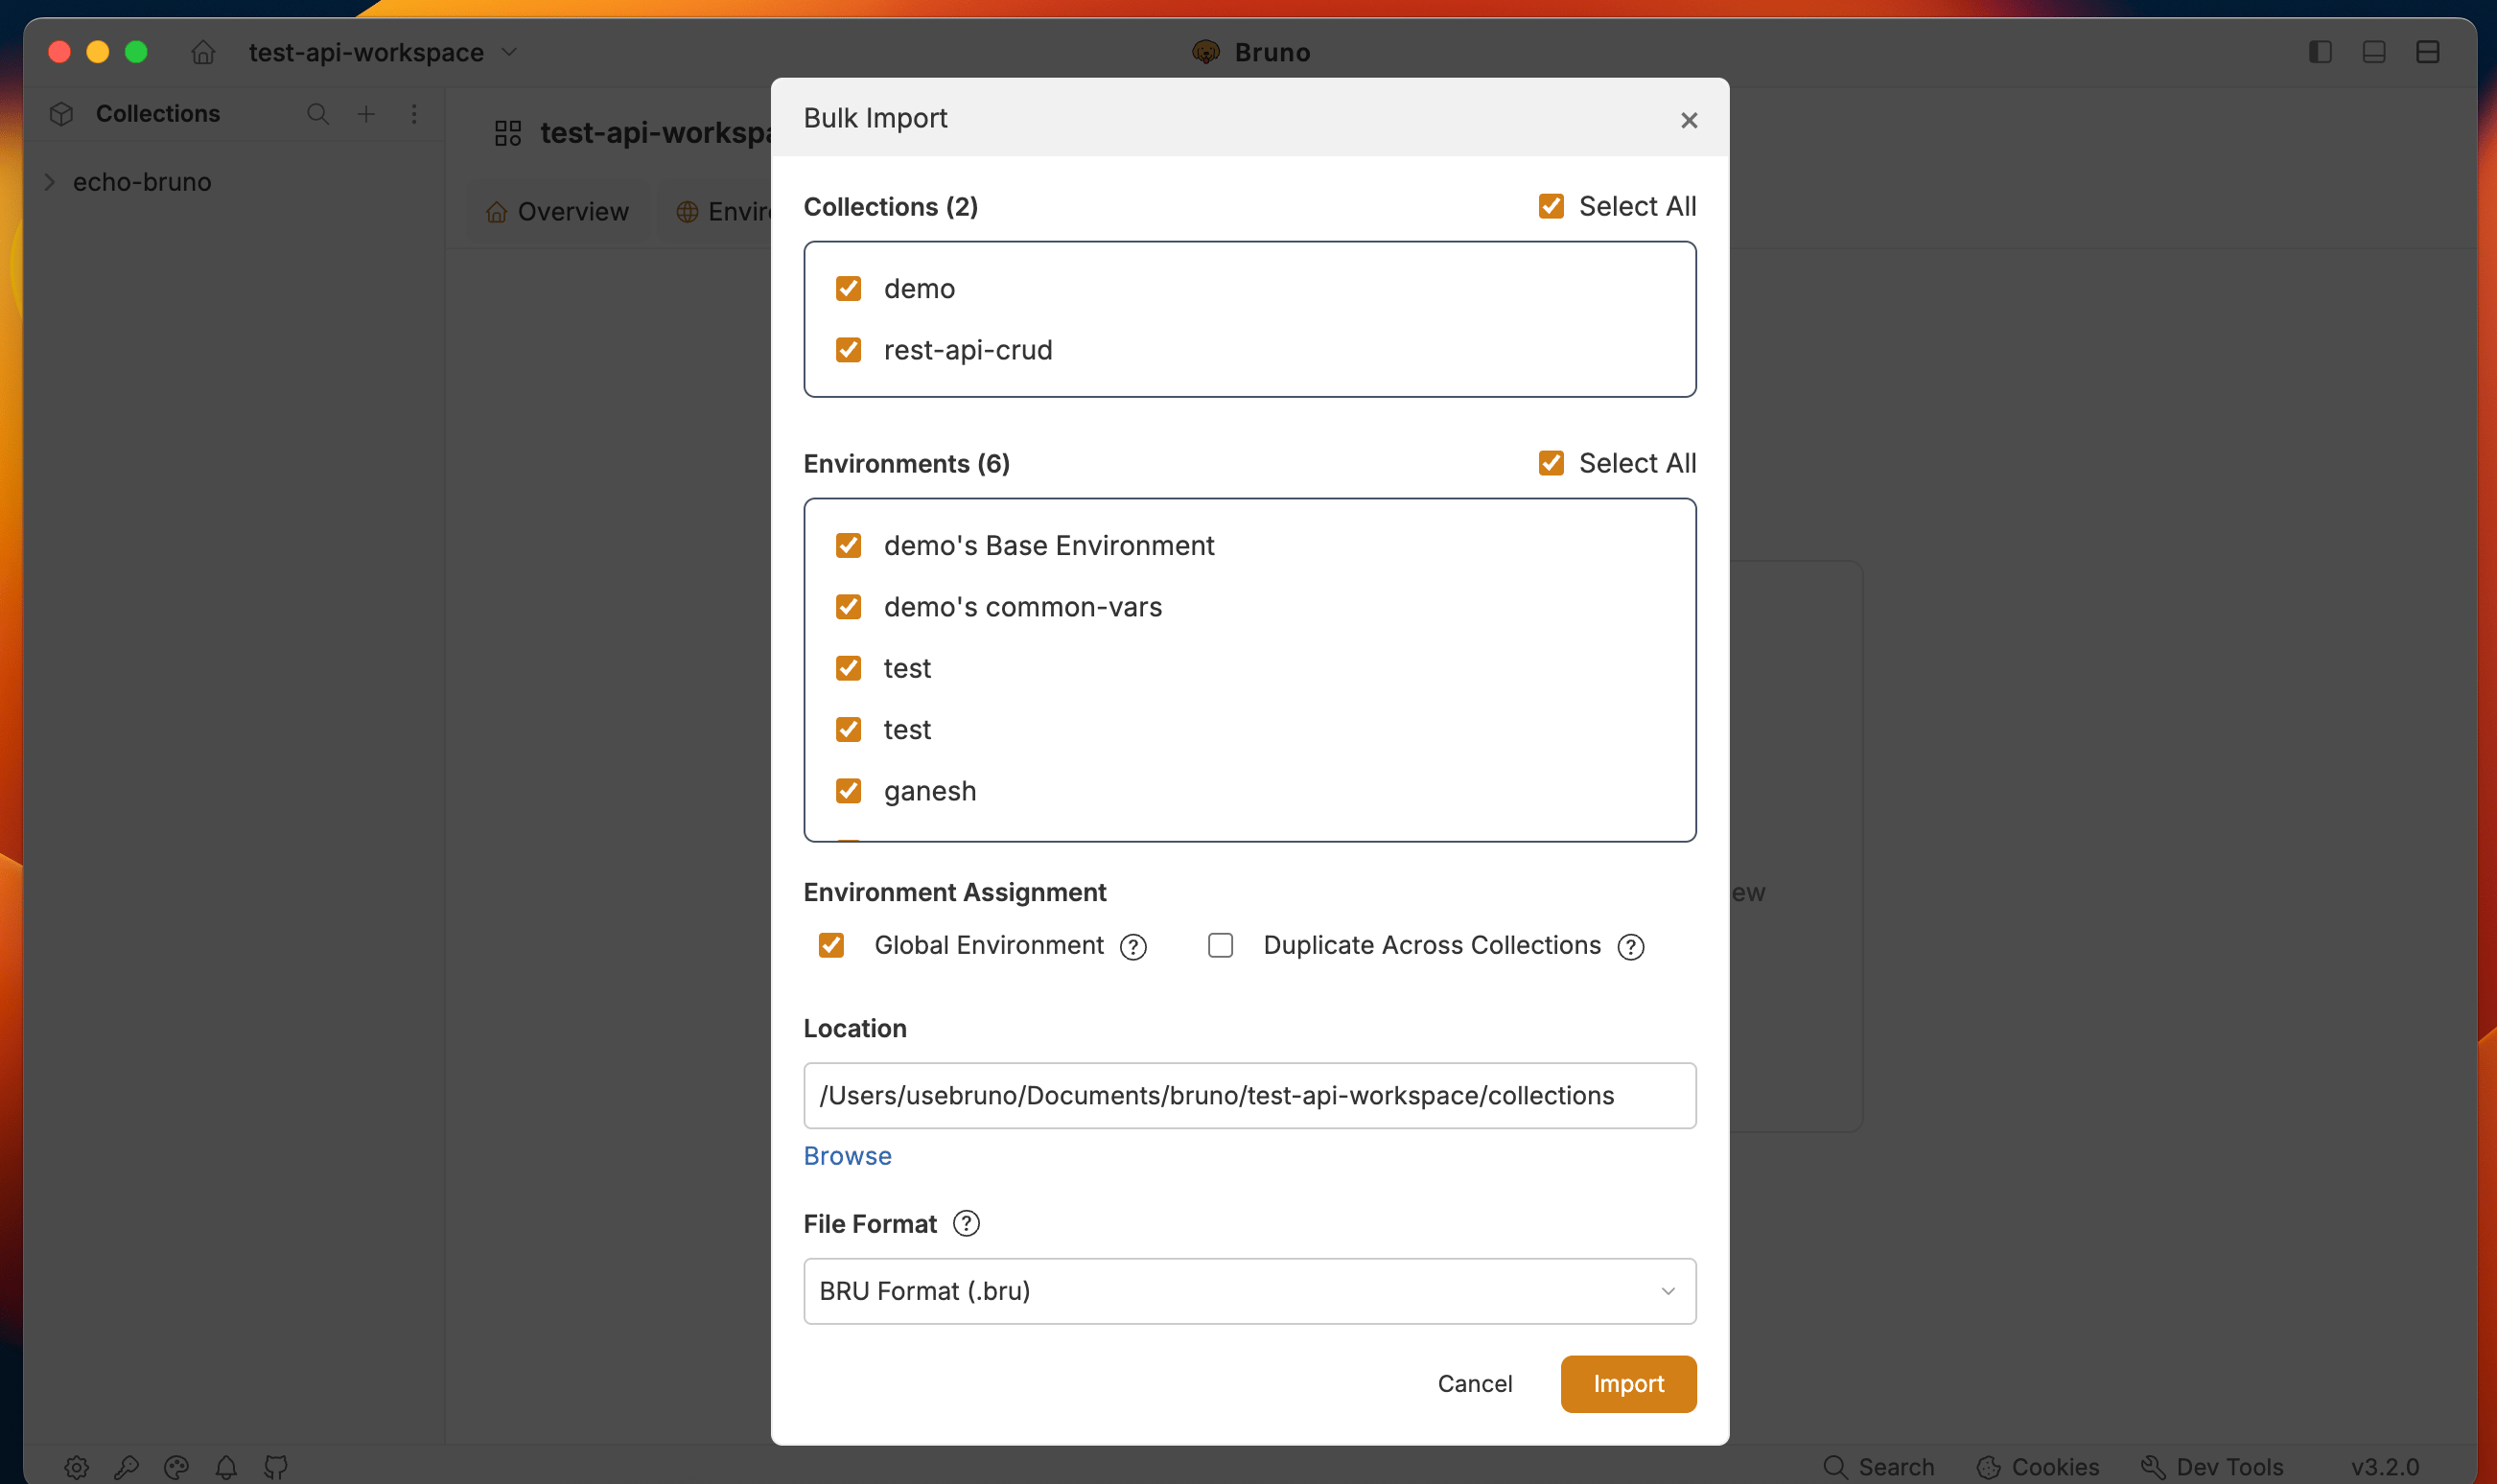
* You will now see a list of all collections available for import. By default, all collections will be selected. You can chose to omit any from the import that you'd like.
* Designate a location for the collections and press `import`
Bruno automatically translates common Postman script APIs (such as `pm.test`, `pm.environment`, `pm.globals`, `pm.collectionVariables`, and `pm.response`) to their Bruno equivalents during import.
See the [Scripts Translator](/get-started/import-export-data/script-translator) page for the full list of supported translations.
## npm packages used by Postman scripts
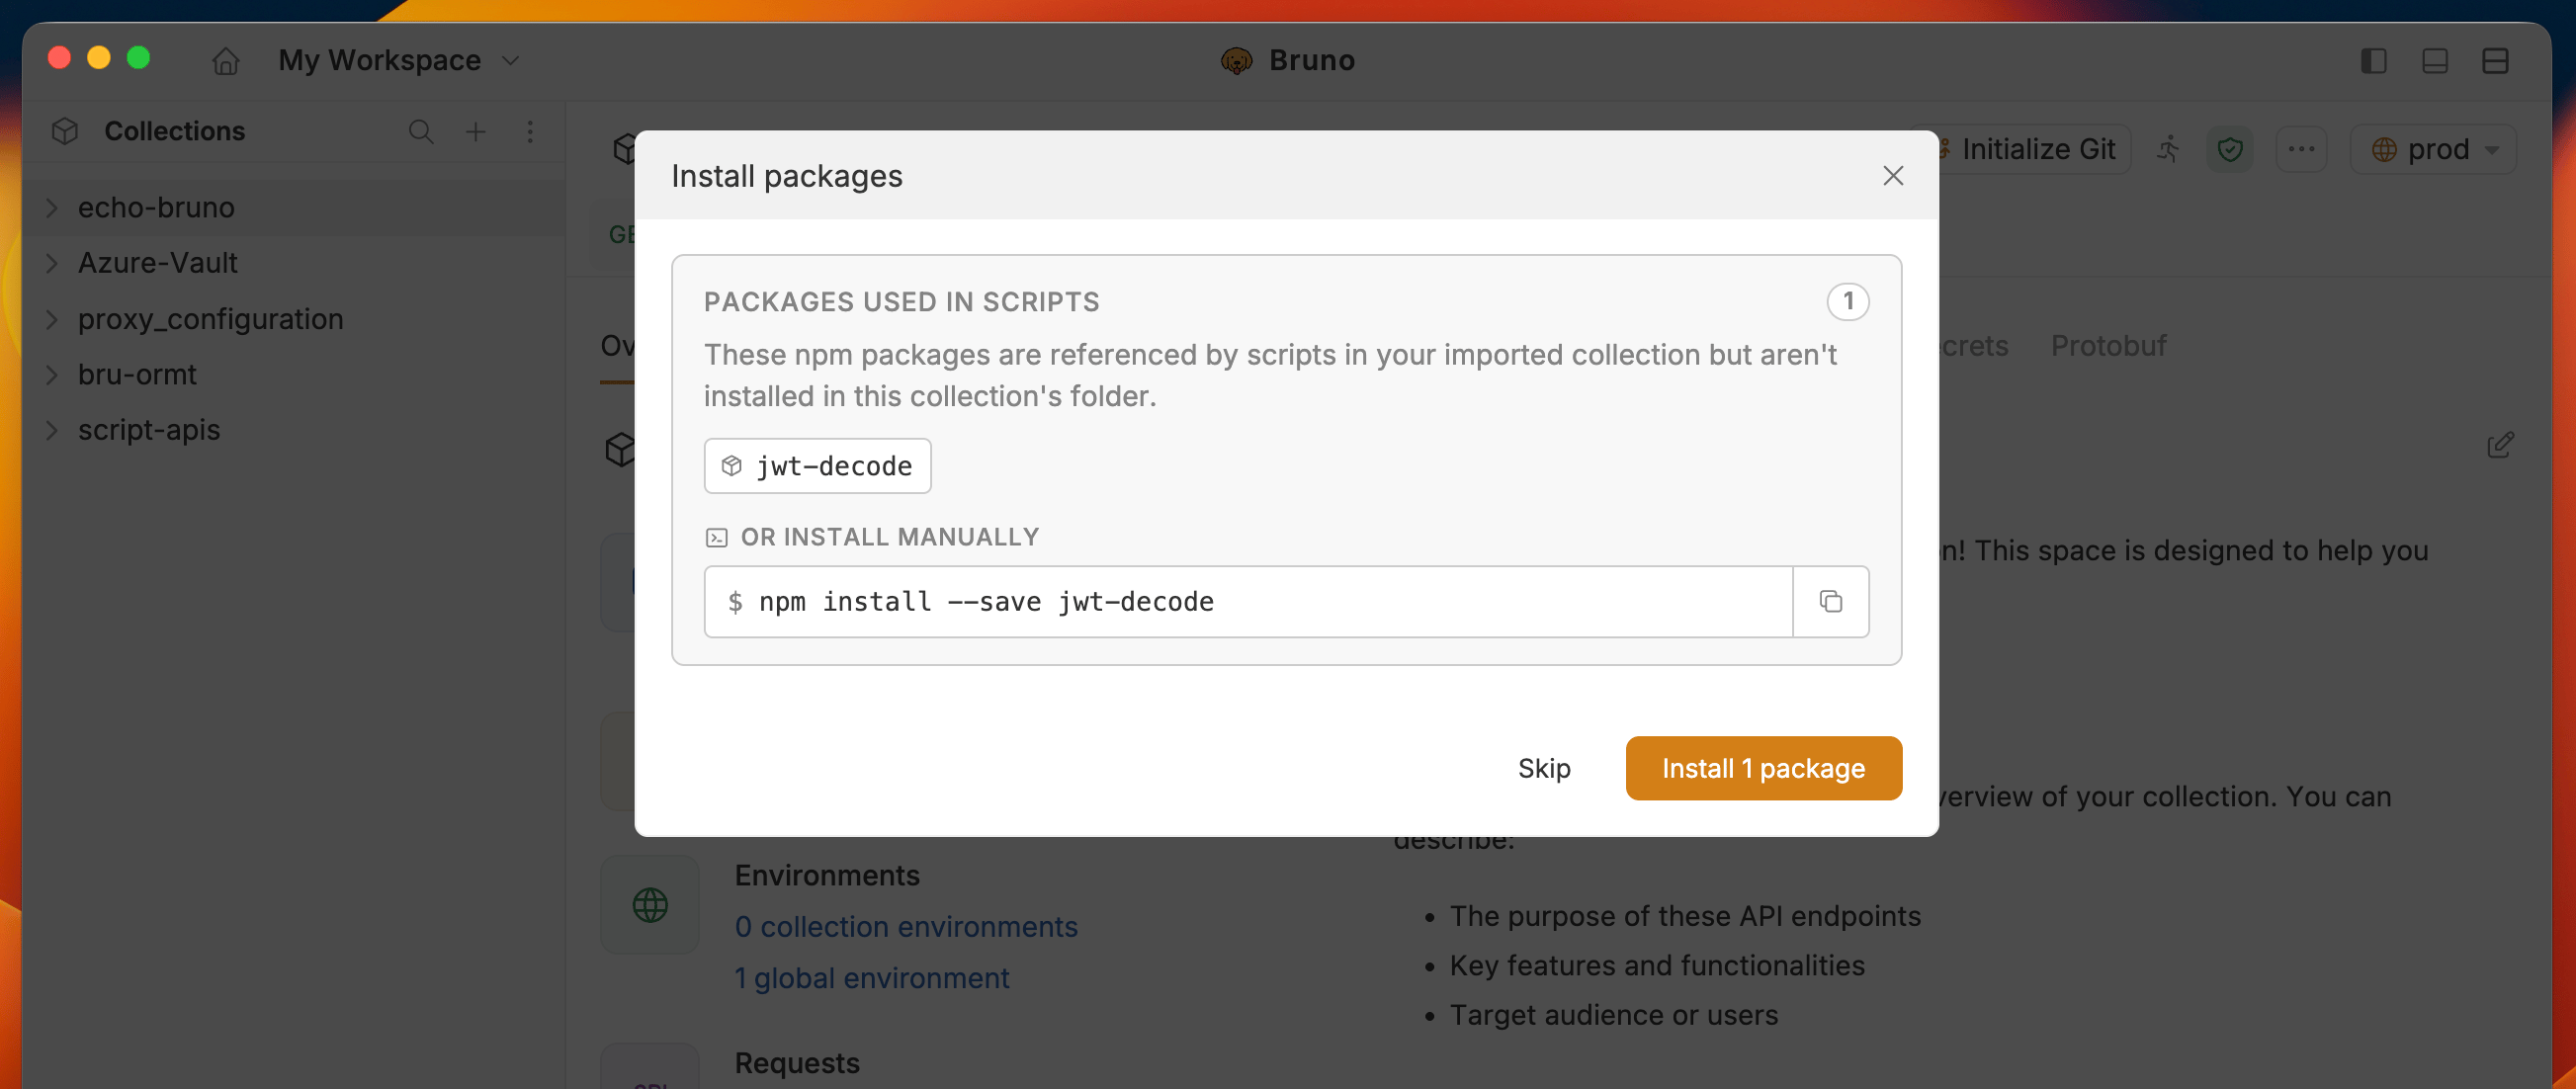
When you import a Postman collection, Bruno scans the scripts for `pm.require()` and `require()` calls and groups any external packages it finds into an **Install packages** prompt. You'll see a dialog-box below after the import completes whenever the collection references packages that need attention.
The prompt can show up to three sections:
| Section | What it means |
| -------------------------------------- | ------------------------------------------------------------------------------------------------------------------------------------------------------------------------------------------------------------------------------------------------------------------ |
| **Packages used in scripts** | npm packages referenced by the imported scripts that aren't yet installed in the collection's folder. Bruno can install them for you with a single click, or you can copy the suggested `npm install --save ` command and run it yourself in a terminal. |
| **Libraries that need Developer Mode** | Bundled libraries and Node.js built-ins (such as `lodash`, `moment`, `crypto`, or `fs`) that are only available when the collection runs in Developer Mode. Bruno offers a **Switch to Developer Mode** action when these are detected. |
| **Not supported in Bruno** | Postman-specific packages without a Bruno equivalent (for example, `postman-collection`, `postman-runtime`, `newman`, or `@postman/*` packages). Scripts that call these will fail at runtime and need to be rewritten. |
Only enable Developer Mode for collections you trust. In Developer Mode, scripts can access the filesystem and execute system commands. See the [JavaScript Sandbox](/get-started/configure/javascript-sandbox) page for details.
After Bruno finishes installing the requested packages, the prompt confirms the install and if the collection is still in Safe Mode, it will offer to switch it to Developer Mode so the newly installed packages can be loaded by `require()` at runtime.
If npm isn't on your `PATH`, the install step fails with a clear error. Install Node.js/npm, then either retry from the prompt or run the suggested command manually.
Bulk imports queue one prompt per imported collection so you can review each one in turn.
## Environment Import and Export
Environments in API clients are sets of variables that allow you to run requests against different server configurations (development, staging, production) without changing your request URLs.
### Exporting Environment from Postman
1. Open Postman and locate the **Environments** section in the sidebar
2. Find the environment you want to export
3. Click on the three dots (**...**) next to the environment name
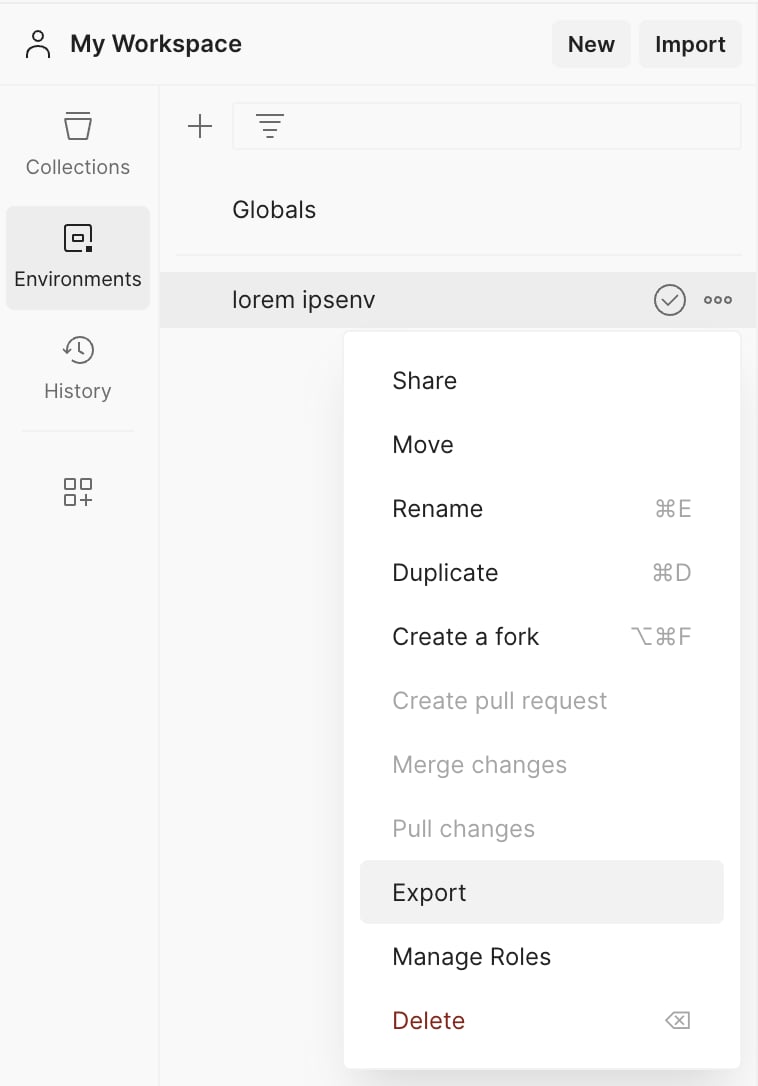
4. Select **Export** from the dropdown menu
5. Choose a location to save the JSON file and click **Save**
### Importing Environment into Bruno
#### Importing Your First Environment
1. Open Bruno
2. Click on the **Environments** icon in the top-right corner
3. Click on **Configure environments**
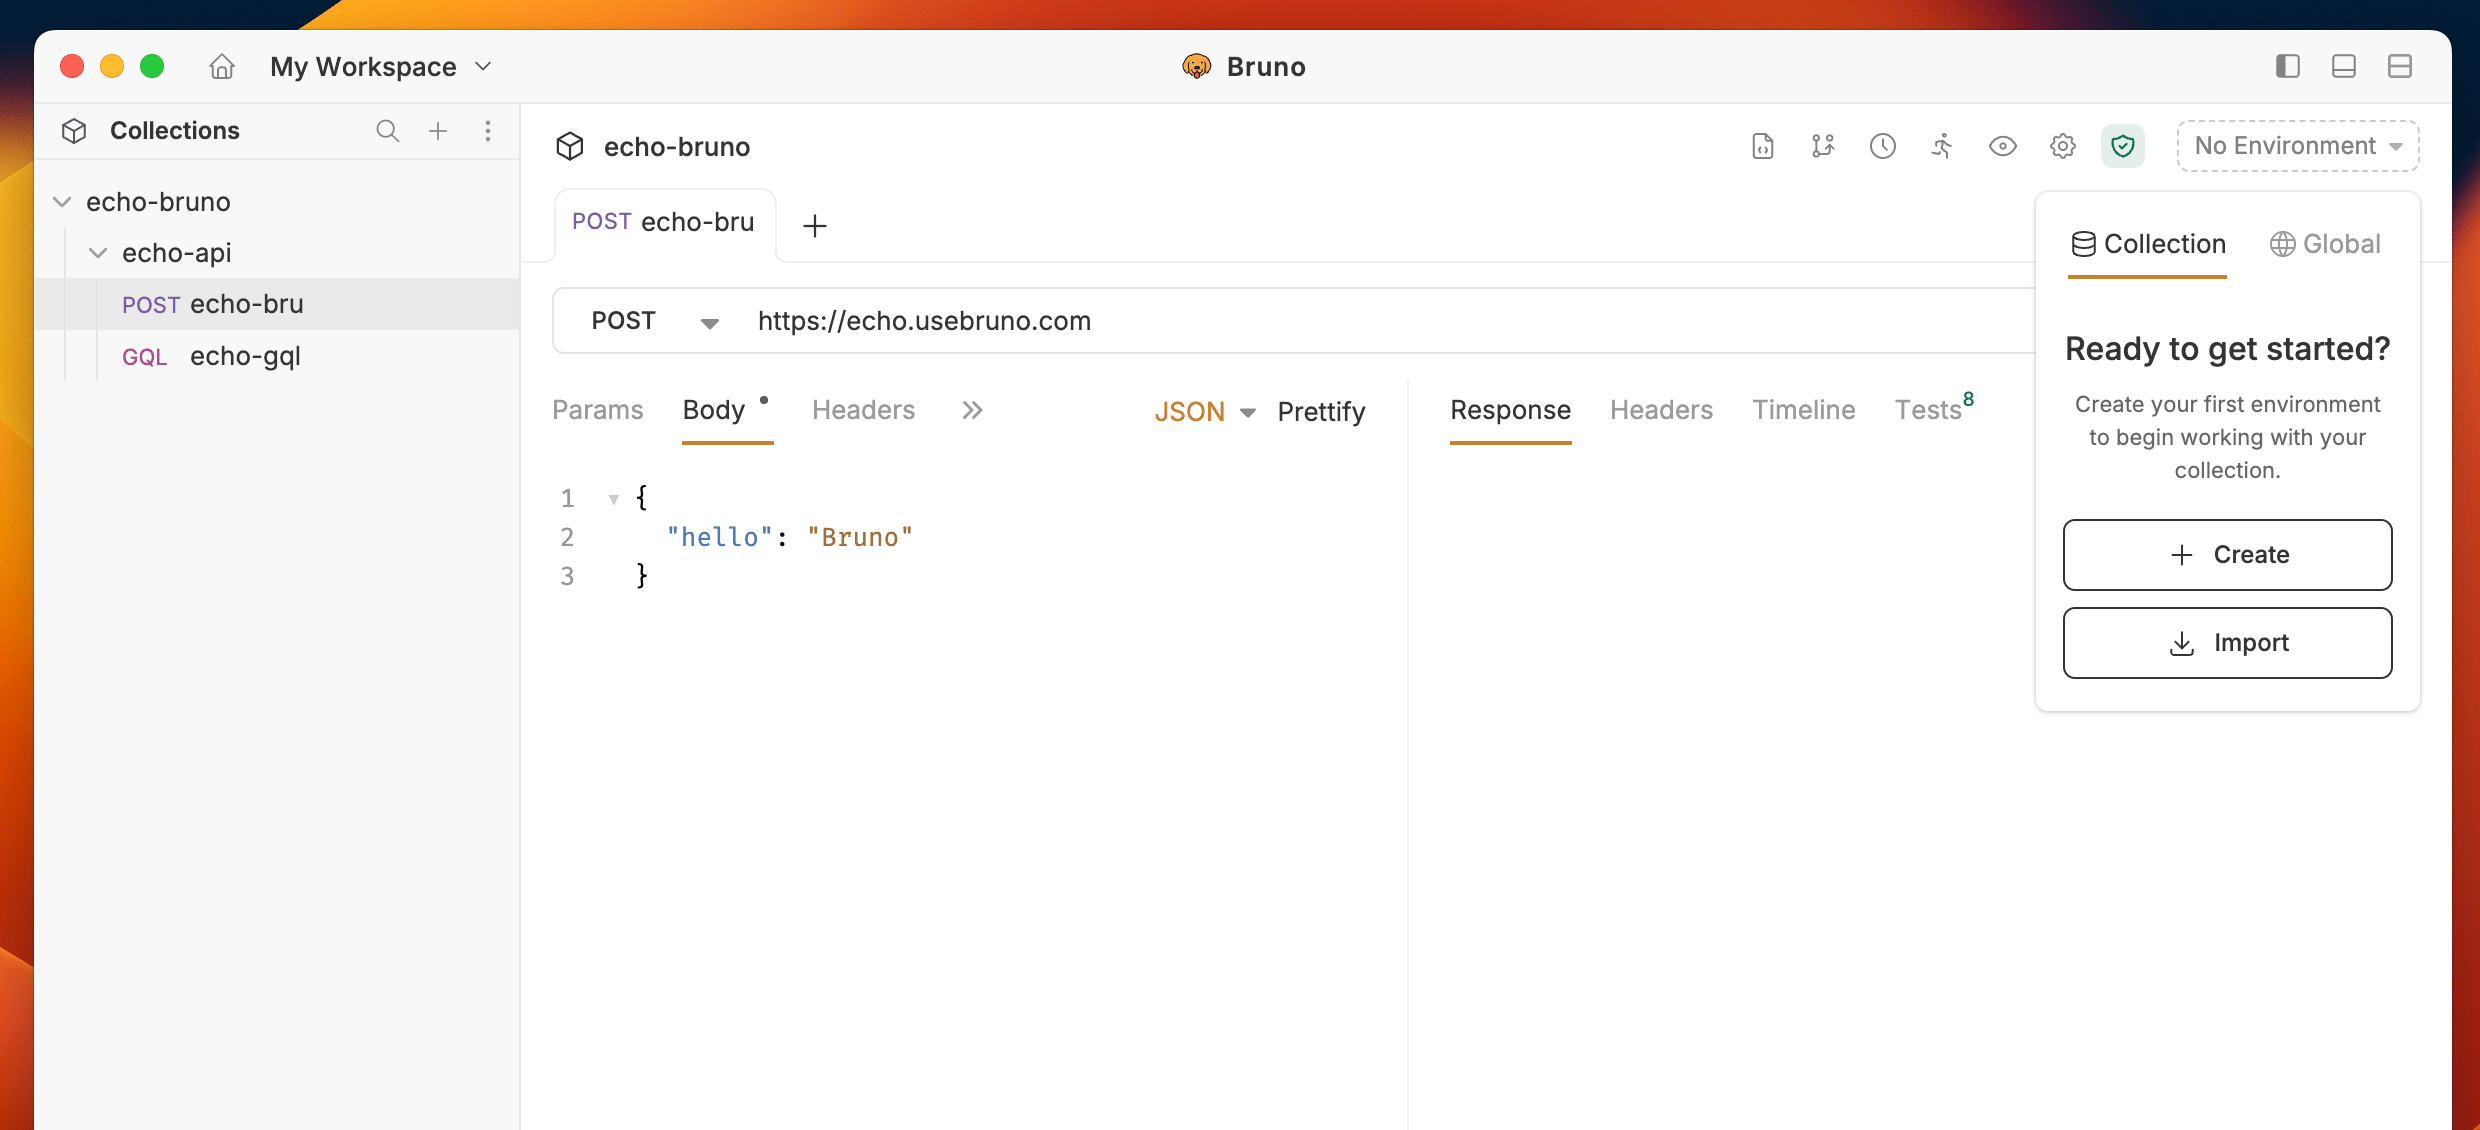
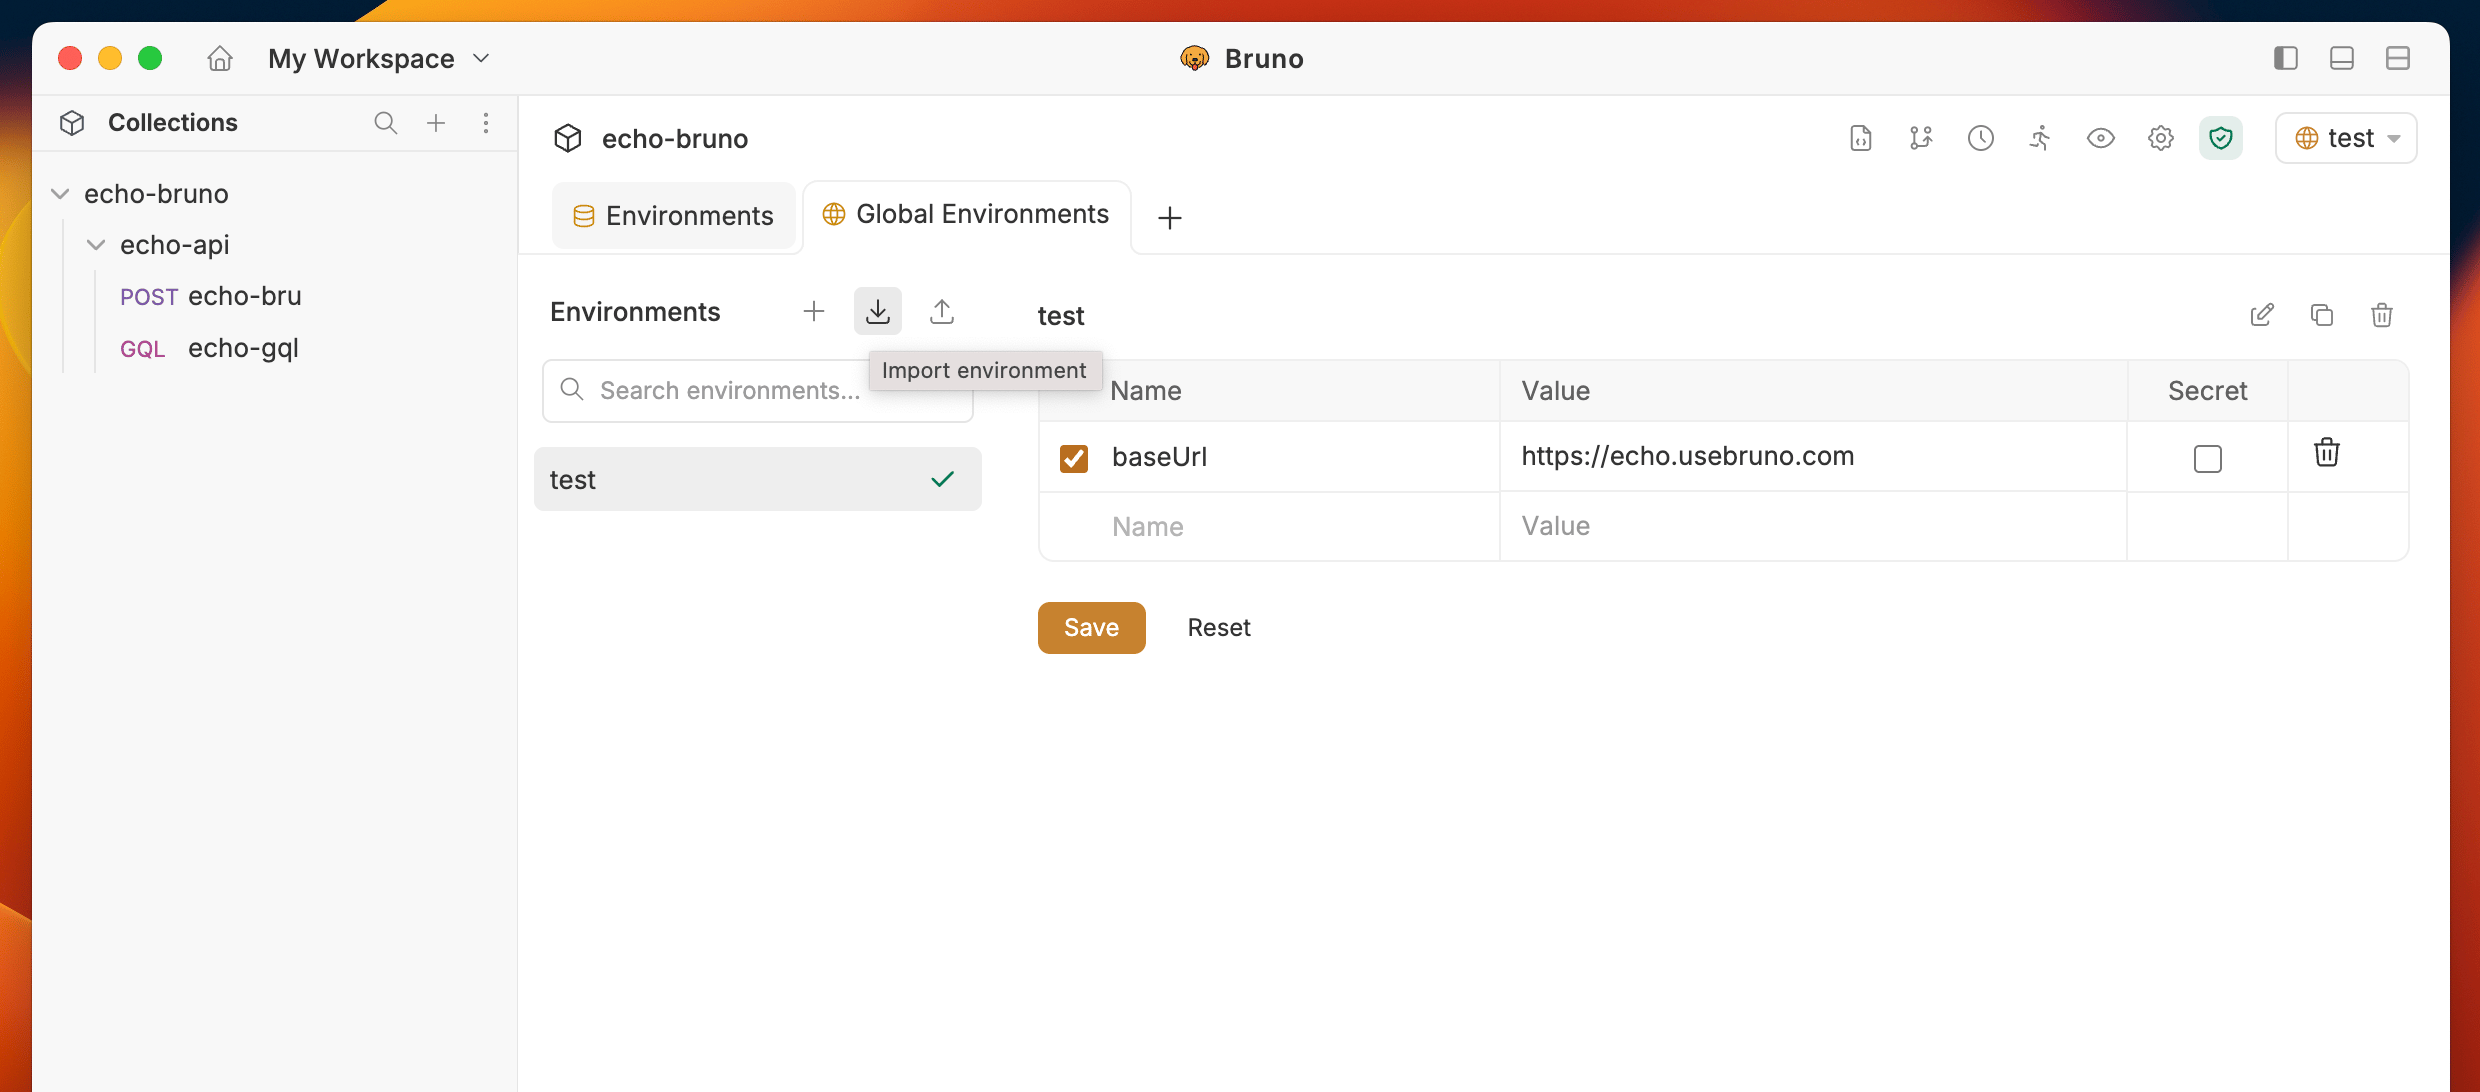
4. You'll see options to **Create environment** and **Import environment**
5. Click on **Import environment**
6. Select the Postman environment JSON file you exported
7. The environment will be imported with all its variables
#### Adding to Existing Environments
1. Open Bruno
2. Click on the **Environments** icon in the top-right corner
3. Click on **Configure environments**
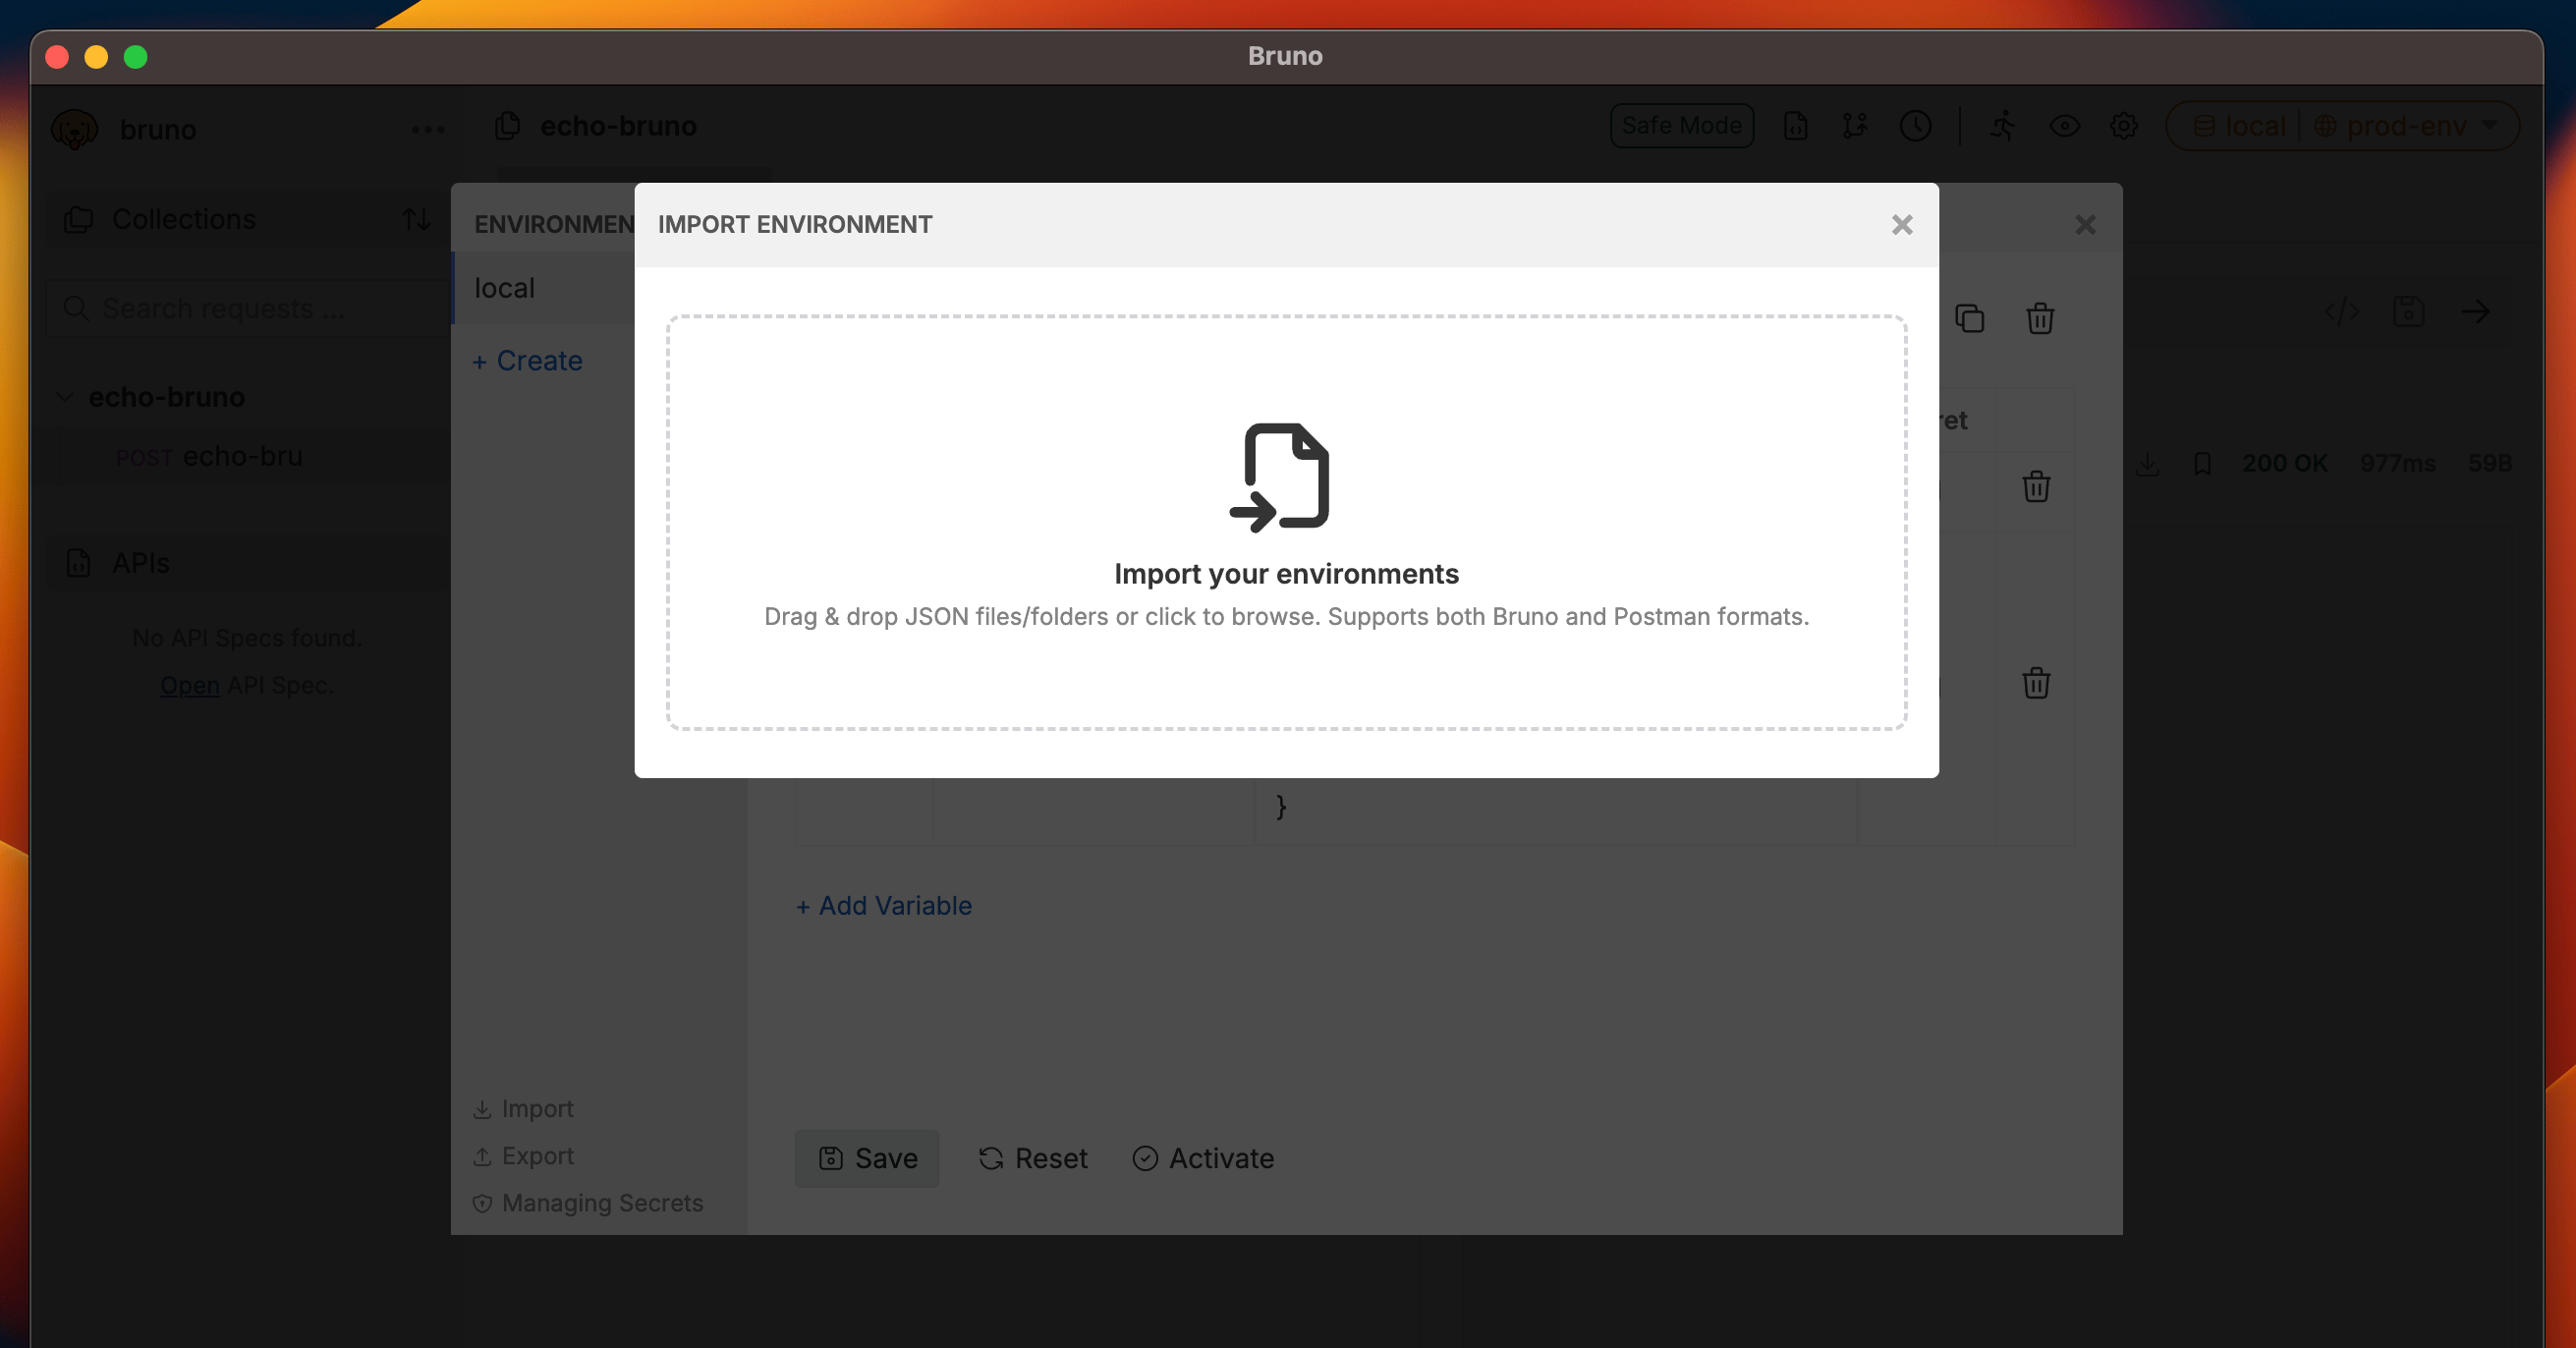
4. Look for the **Import** button at the left sidebar
5. Click on **Import environment**
6. Select the Postman environment JSON file you exported
7. The environment will be added to your existing environments
With environments properly configured, your API requests will work seamlessly across different deployment environments without manual changes.
Note - Bruno environment names and variables must only contain alphanumeric characters, "-", "\_", "." and cannot start with a digit. Non-conforming characters (such as "/") will be converted to "-".
Postman allows variable values to be numbers, booleans, or objects, but Bruno stores all variable values as strings. During import, non-string values are automatically converted — for example, `5000` becomes `"5000"`, `true` becomes `"true"`, and objects are serialized as JSON strings.
 A popup dialog will appear, select either `Collection v2` or `Collection v2.1` format and click on the `Export` button.
 The collection will be downloaded as a JSON file.
Now simply follow the instructions for [Importing Collections](/get-started/import-export-data/import-collections) and you're done!
## Export Data Dump
The collection will be downloaded as a JSON file.
Now simply follow the instructions for [Importing Collections](/get-started/import-export-data/import-collections) and you're done!
## Export Data Dump
 The prompt can show up to three sections:
| Section | What it means |
| -------------------------------------- | ------------------------------------------------------------------------------------------------------------------------------------------------------------------------------------------------------------------------------------------------------------------ |
| **Packages used in scripts** | npm packages referenced by the imported scripts that aren't yet installed in the collection's folder. Bruno can install them for you with a single click, or you can copy the suggested `npm install --save
The prompt can show up to three sections:
| Section | What it means |
| -------------------------------------- | ------------------------------------------------------------------------------------------------------------------------------------------------------------------------------------------------------------------------------------------------------------------ |
| **Packages used in scripts** | npm packages referenced by the imported scripts that aren't yet installed in the collection's folder. Bruno can install them for you with a single click, or you can copy the suggested `npm install --save 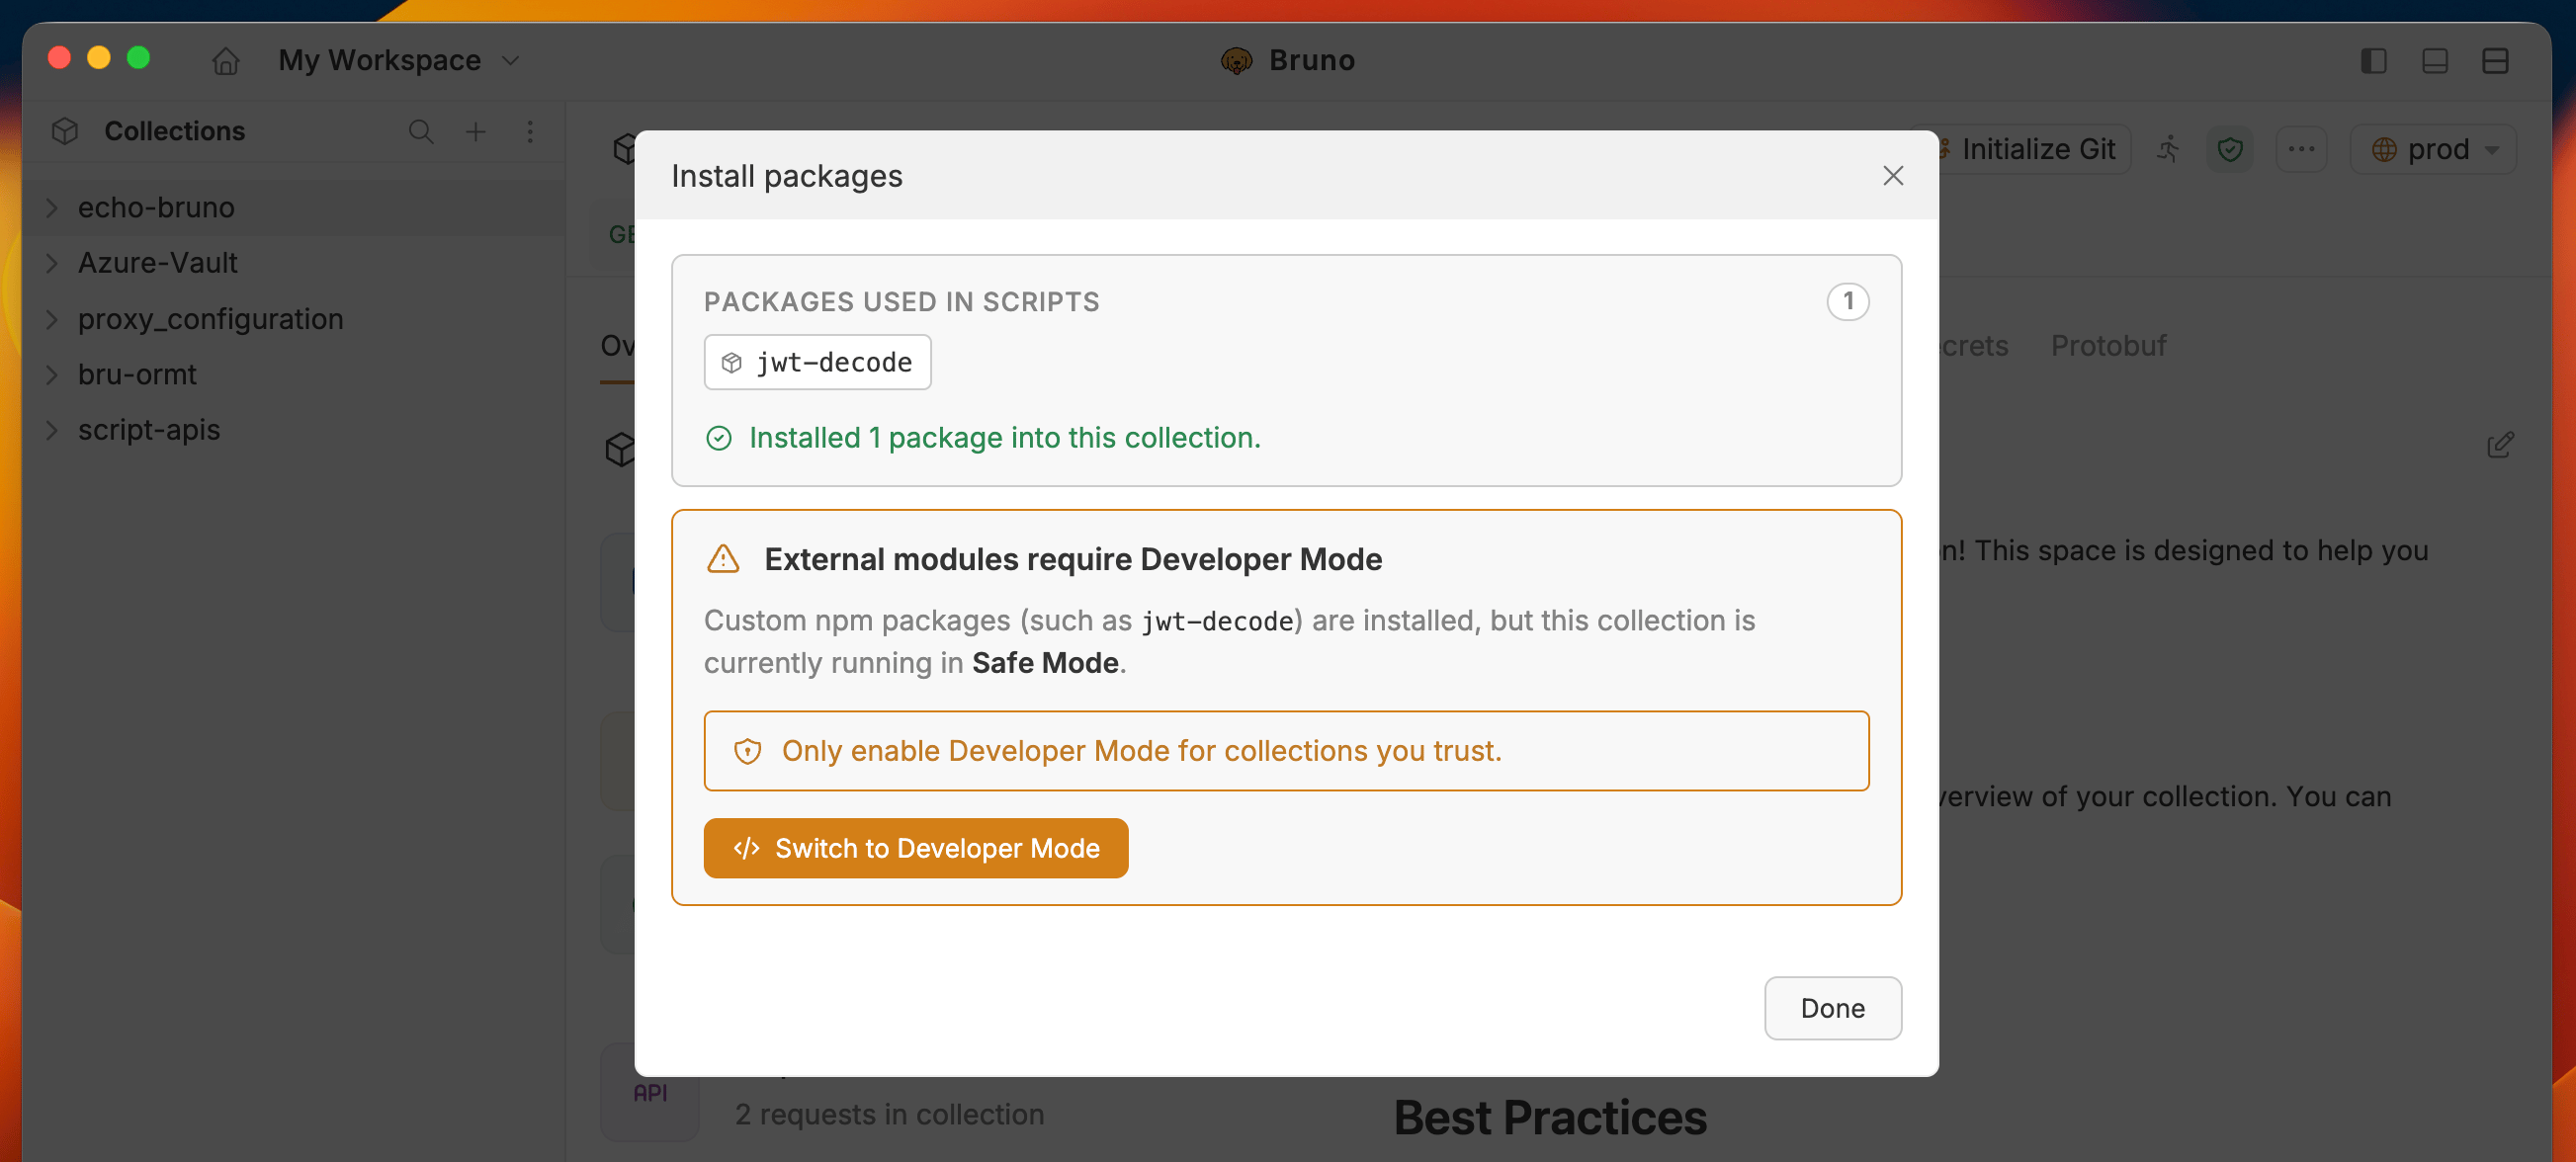
 5. Choose a location to save the JSON file and click **Save**
### Importing Environment into Bruno
#### Importing Your First Environment
1. Open Bruno
2. Click on the **Environments** icon in the top-right corner
3. Click on **Configure environments**
4. You'll see options to **Create environment** and **Import environment**
5. Choose a location to save the JSON file and click **Save**
### Importing Environment into Bruno
#### Importing Your First Environment
1. Open Bruno
2. Click on the **Environments** icon in the top-right corner
3. Click on **Configure environments**
4. You'll see options to **Create environment** and **Import environment**
 5. Click on **Import environment**
 6. Select the Postman environment JSON file you exported
7. The environment will be imported with all its variables
#### Adding to Existing Environments
1. Open Bruno
2. Click on the **Environments** icon in the top-right corner
3. Click on **Configure environments**
4. Look for the **Import** button at the left sidebar
5. Click on **Import environment**
6. Select the Postman environment JSON file you exported
7. The environment will be imported with all its variables
#### Adding to Existing Environments
1. Open Bruno
2. Click on the **Environments** icon in the top-right corner
3. Click on **Configure environments**
4. Look for the **Import** button at the left sidebar
5. Click on **Import environment**
 7. The environment will be added to your existing environments
With environments properly configured, your API requests will work seamlessly across different deployment environments without manual changes.
7. The environment will be added to your existing environments
With environments properly configured, your API requests will work seamlessly across different deployment environments without manual changes.