> ## Documentation Index
> Fetch the complete documentation index at: https://bruno-a6972042-mintlify-c74cb75a.mintlify.site/llms.txt
> Use this file to discover all available pages before exploring further.
# Using AI with Apps
> Generate Apps using Bruno AI - just describe what you want and let AI write the code.
Bruno AI understands the context of your open request or collection and can generate a complete working App for you. You don't need to write a single line of HTML or JavaScript.
This works at both the **request level** and the **collection level**. Bruno knows your endpoints, parameters, and variable names, so the generated App is ready to run. It is not just a generic template.
Bruno AI requires a provider key to be configured. See the [AI configuration guide](/ai/bruno-ai/configuration) to connect your own OpenAI, Anthropic, or other BYOK provider before getting started.
***
## Request-level App with AI
A request-level App is scoped to a single request. The AI reads your request's URL, method, body, params, and headers to generate an App that interacts with that specific endpoint.
### How to generate
1. Enable App Mode from request settings to get **App** tab visible.
2. Click the **star (✦) icon** in the code editor toolbar. A prompt popup appears.
3. Describe the App you want.
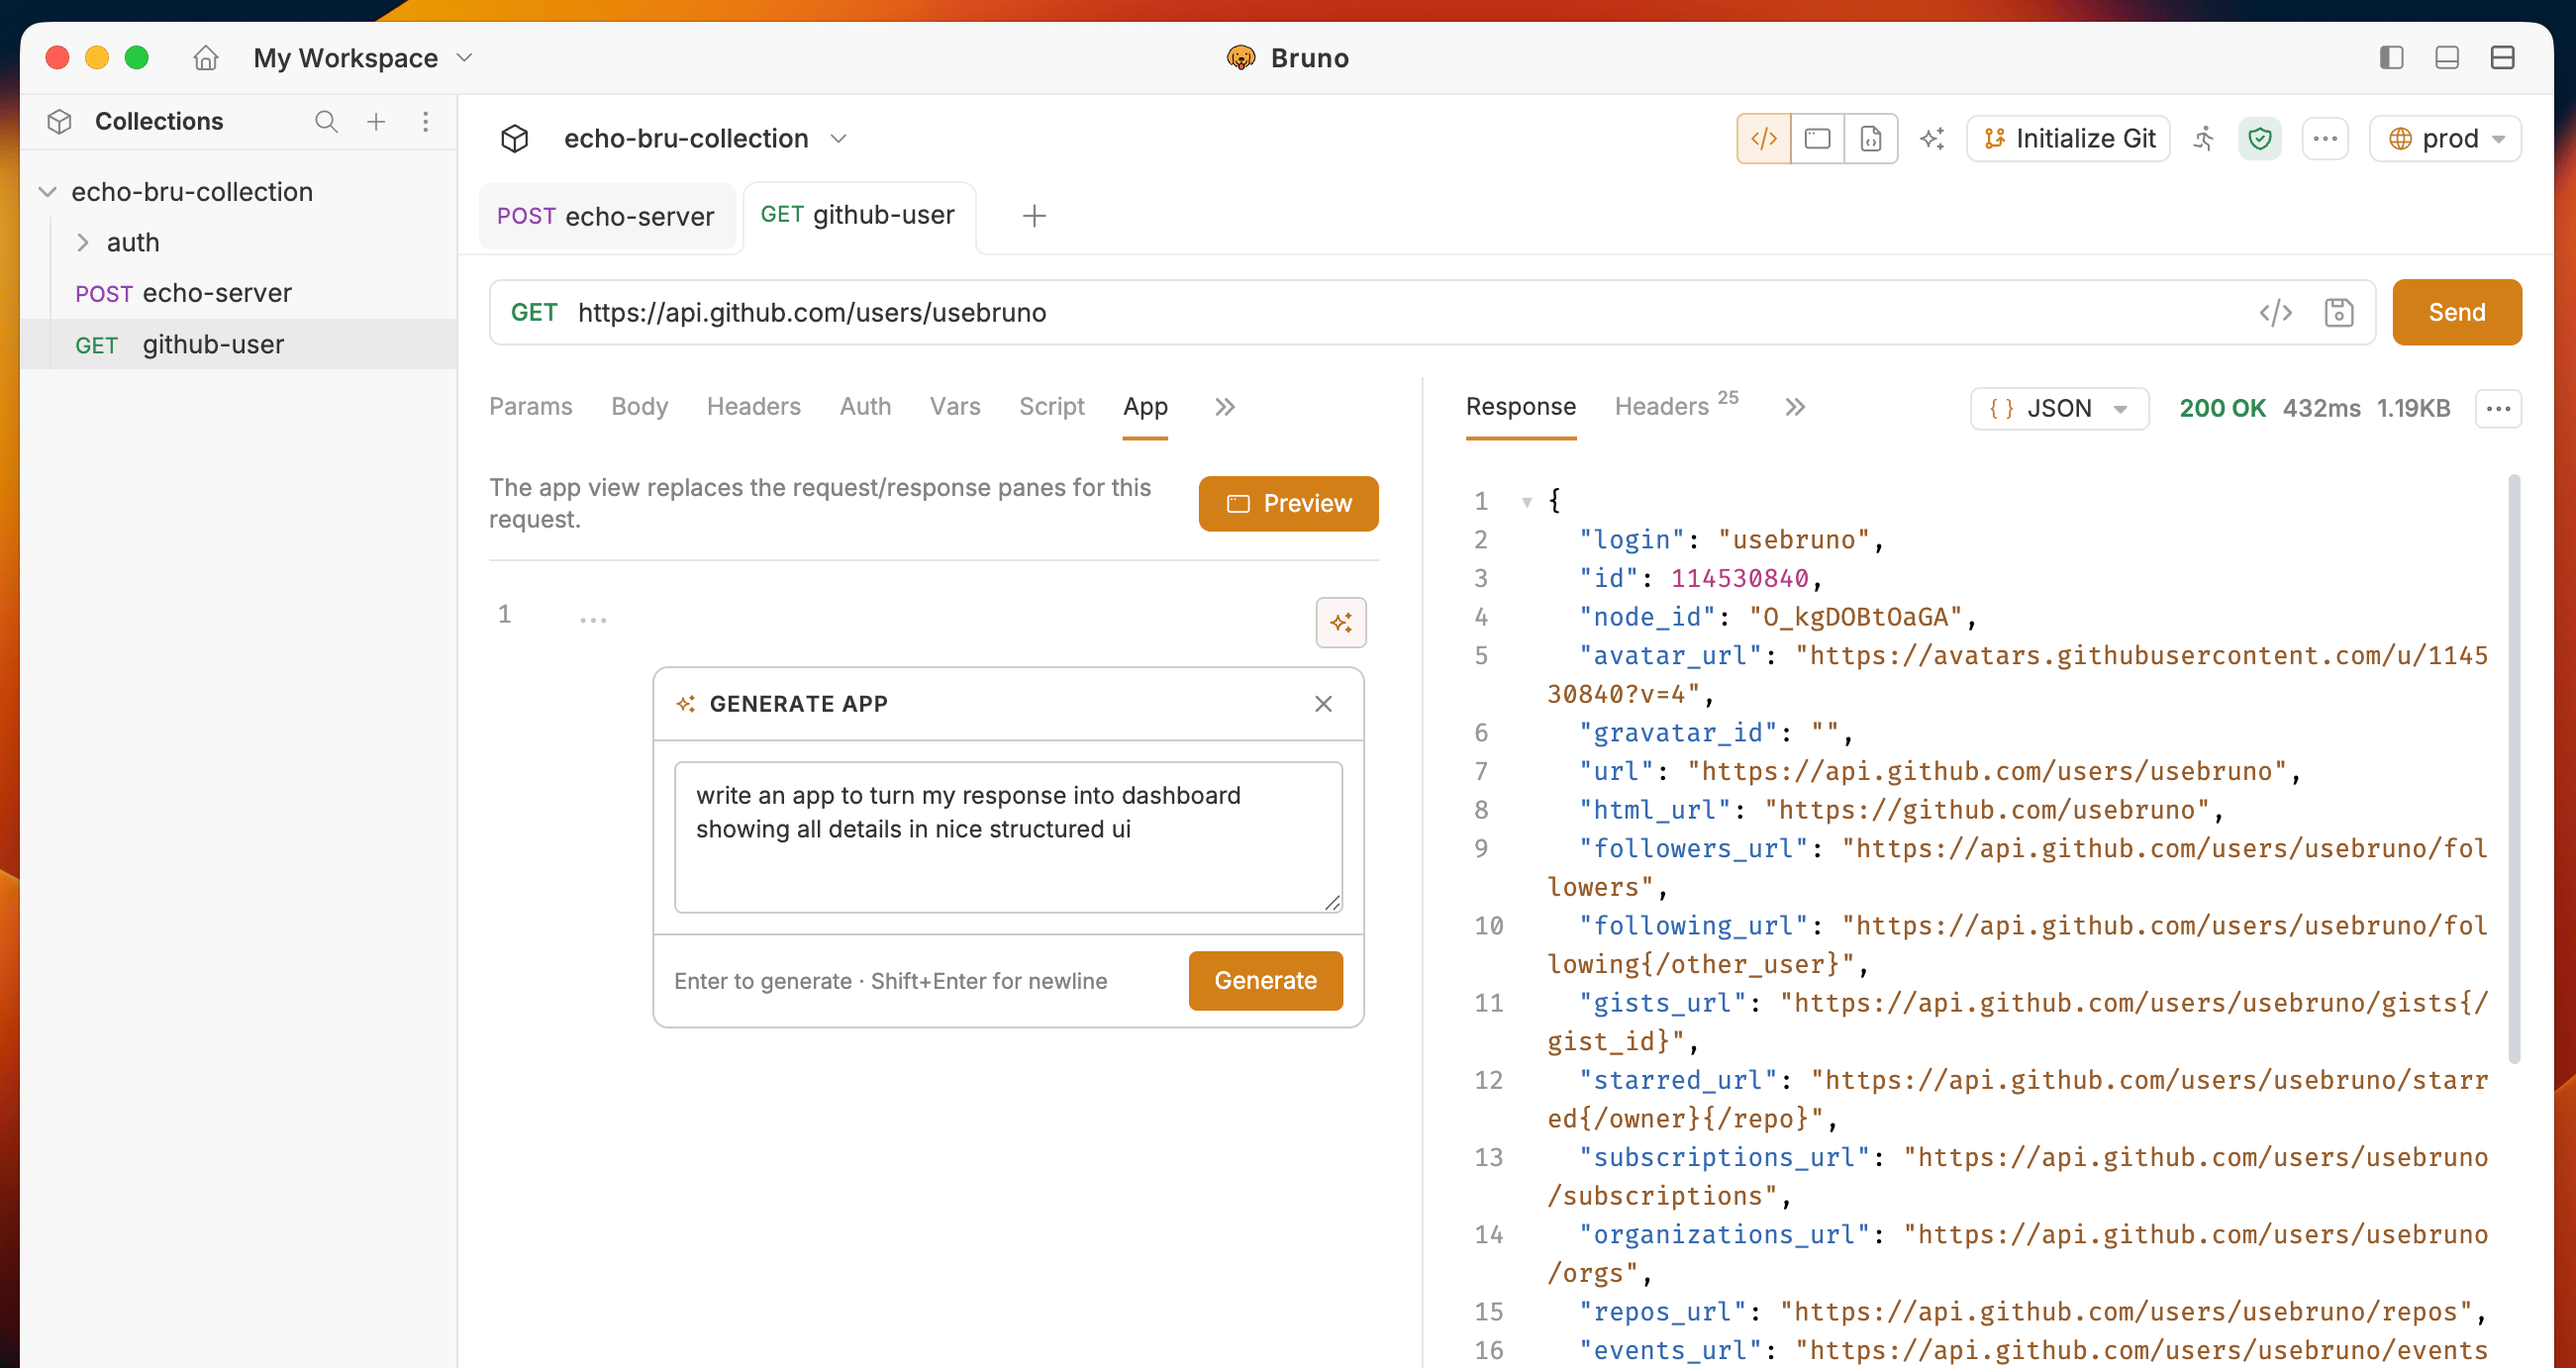 4. Click **Apply** to insert the code into the editor.
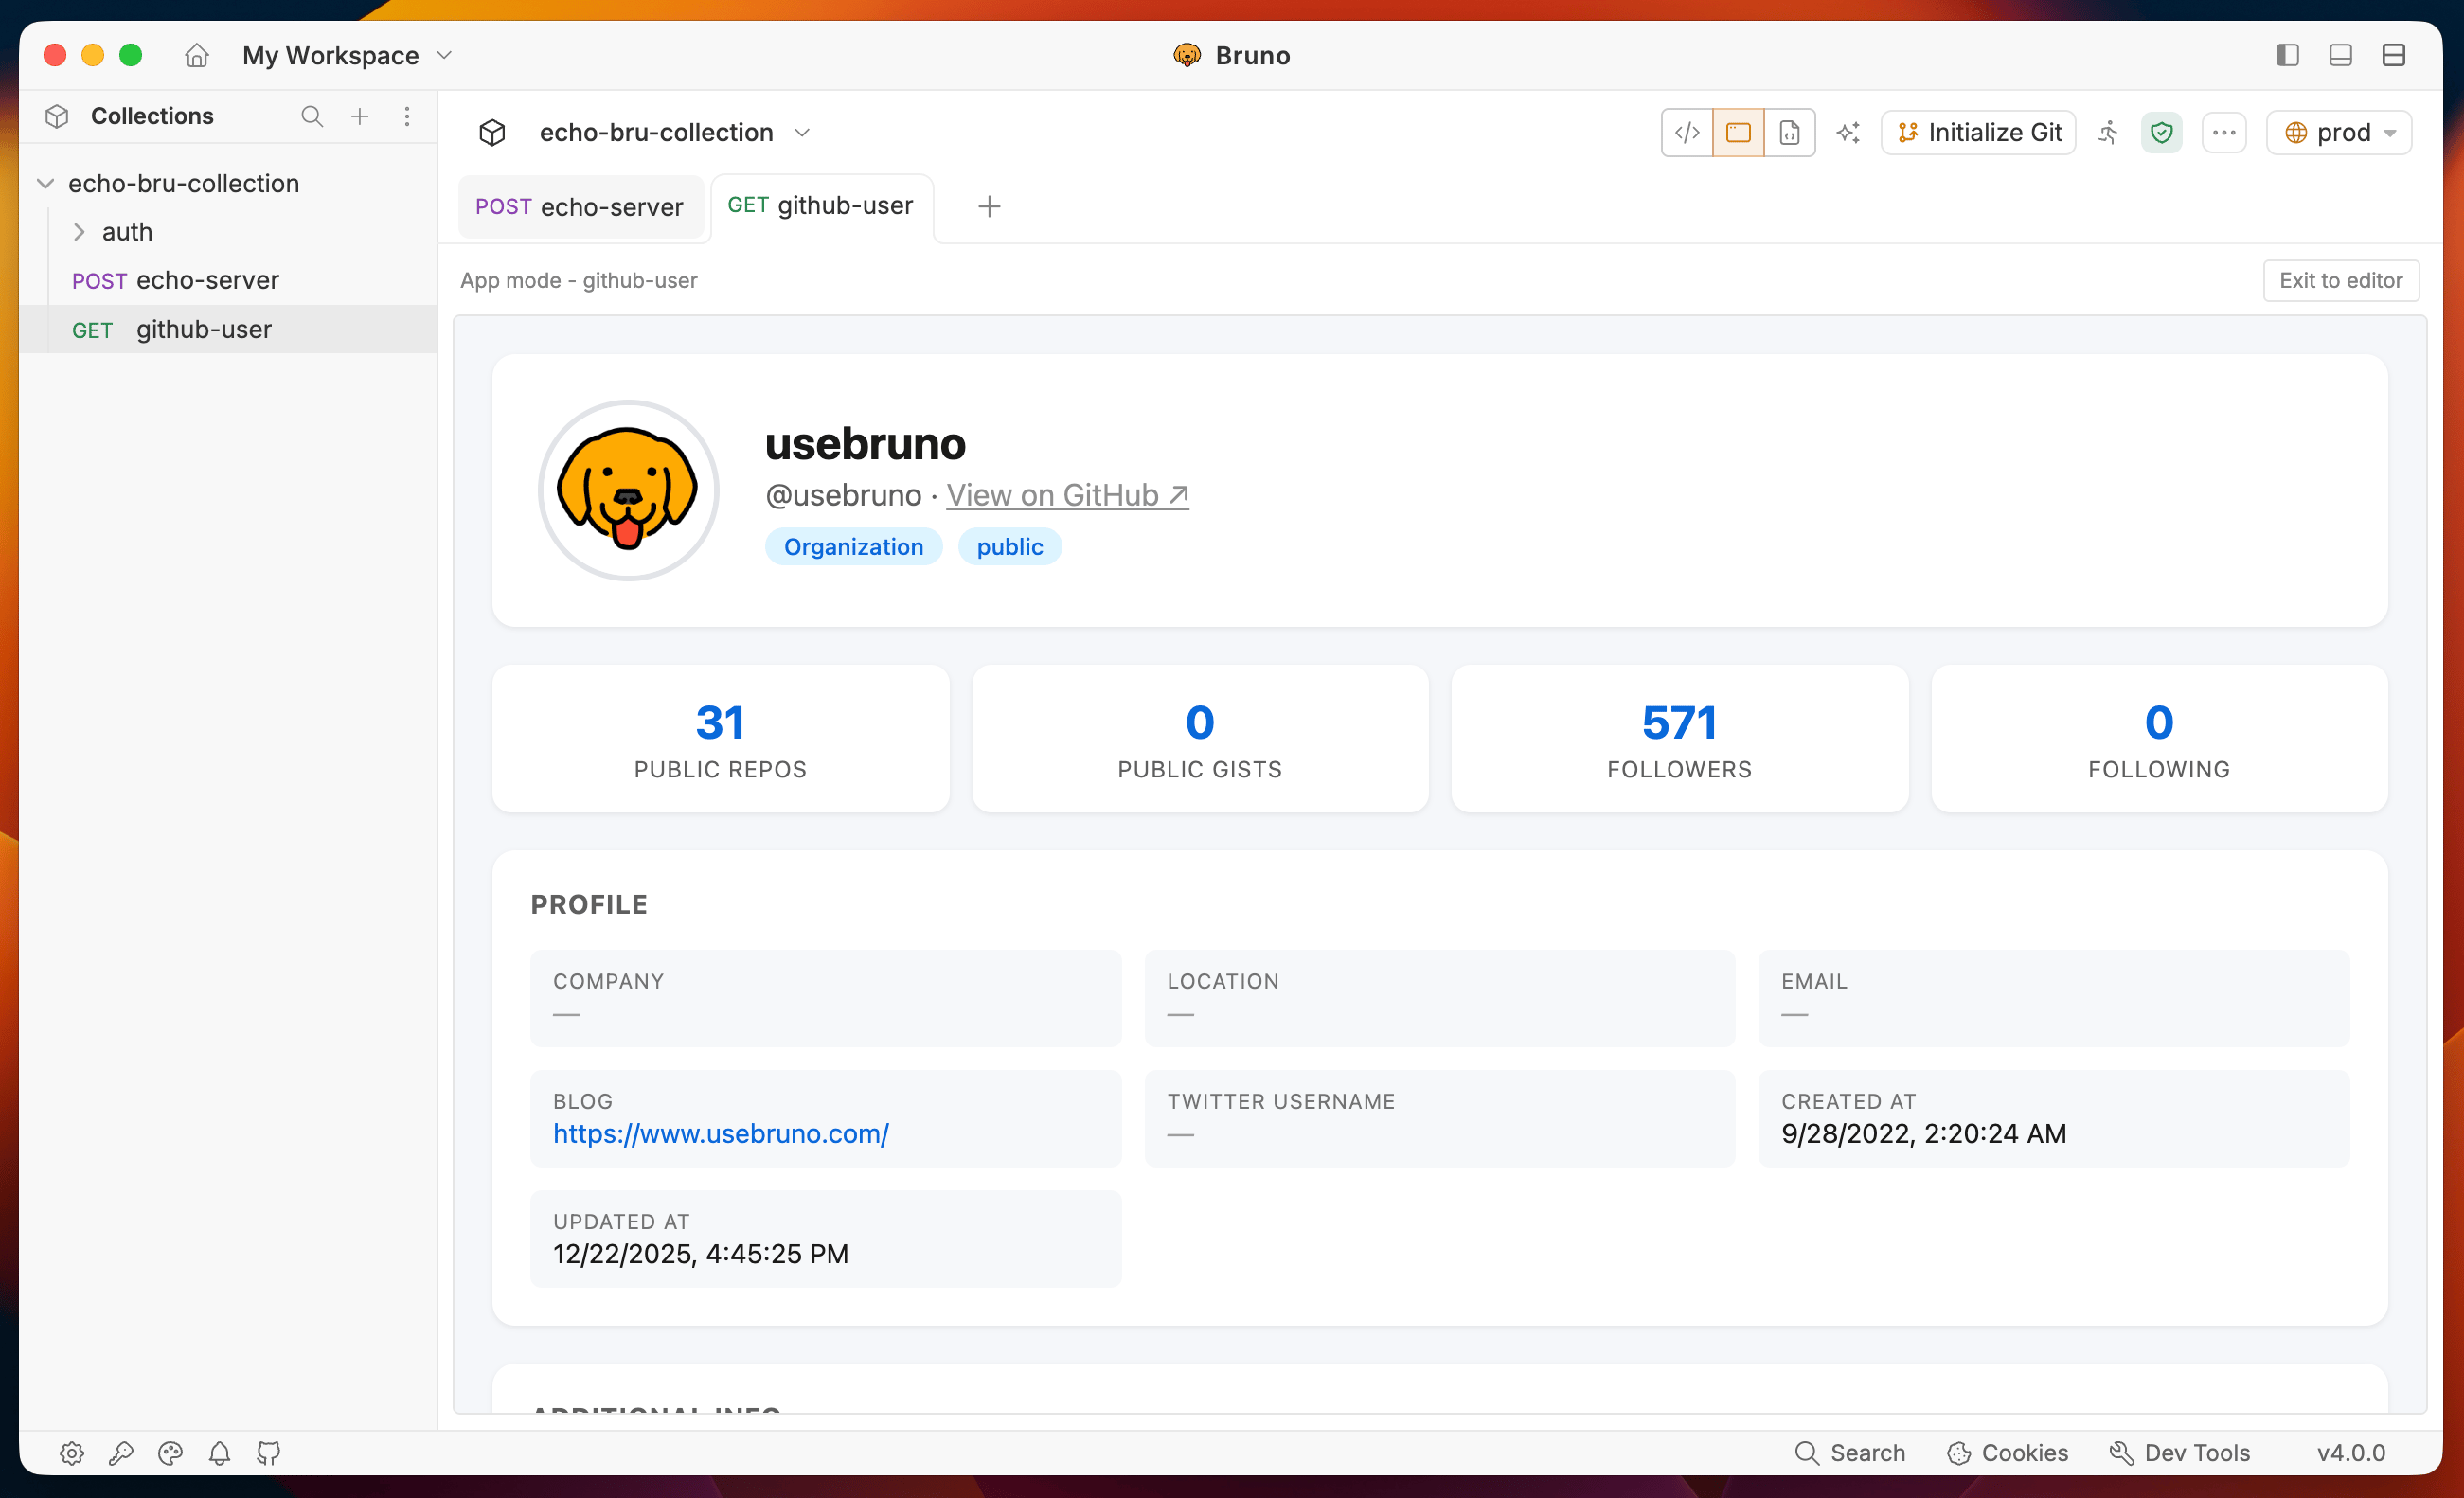
5. Click **Preview** to render the App in the sandbox and verify the output.
4. Click **Apply** to insert the code into the editor.
5. Click **Preview** to render the App in the sandbox and verify the output.
 ***
## Collection-level App with AI
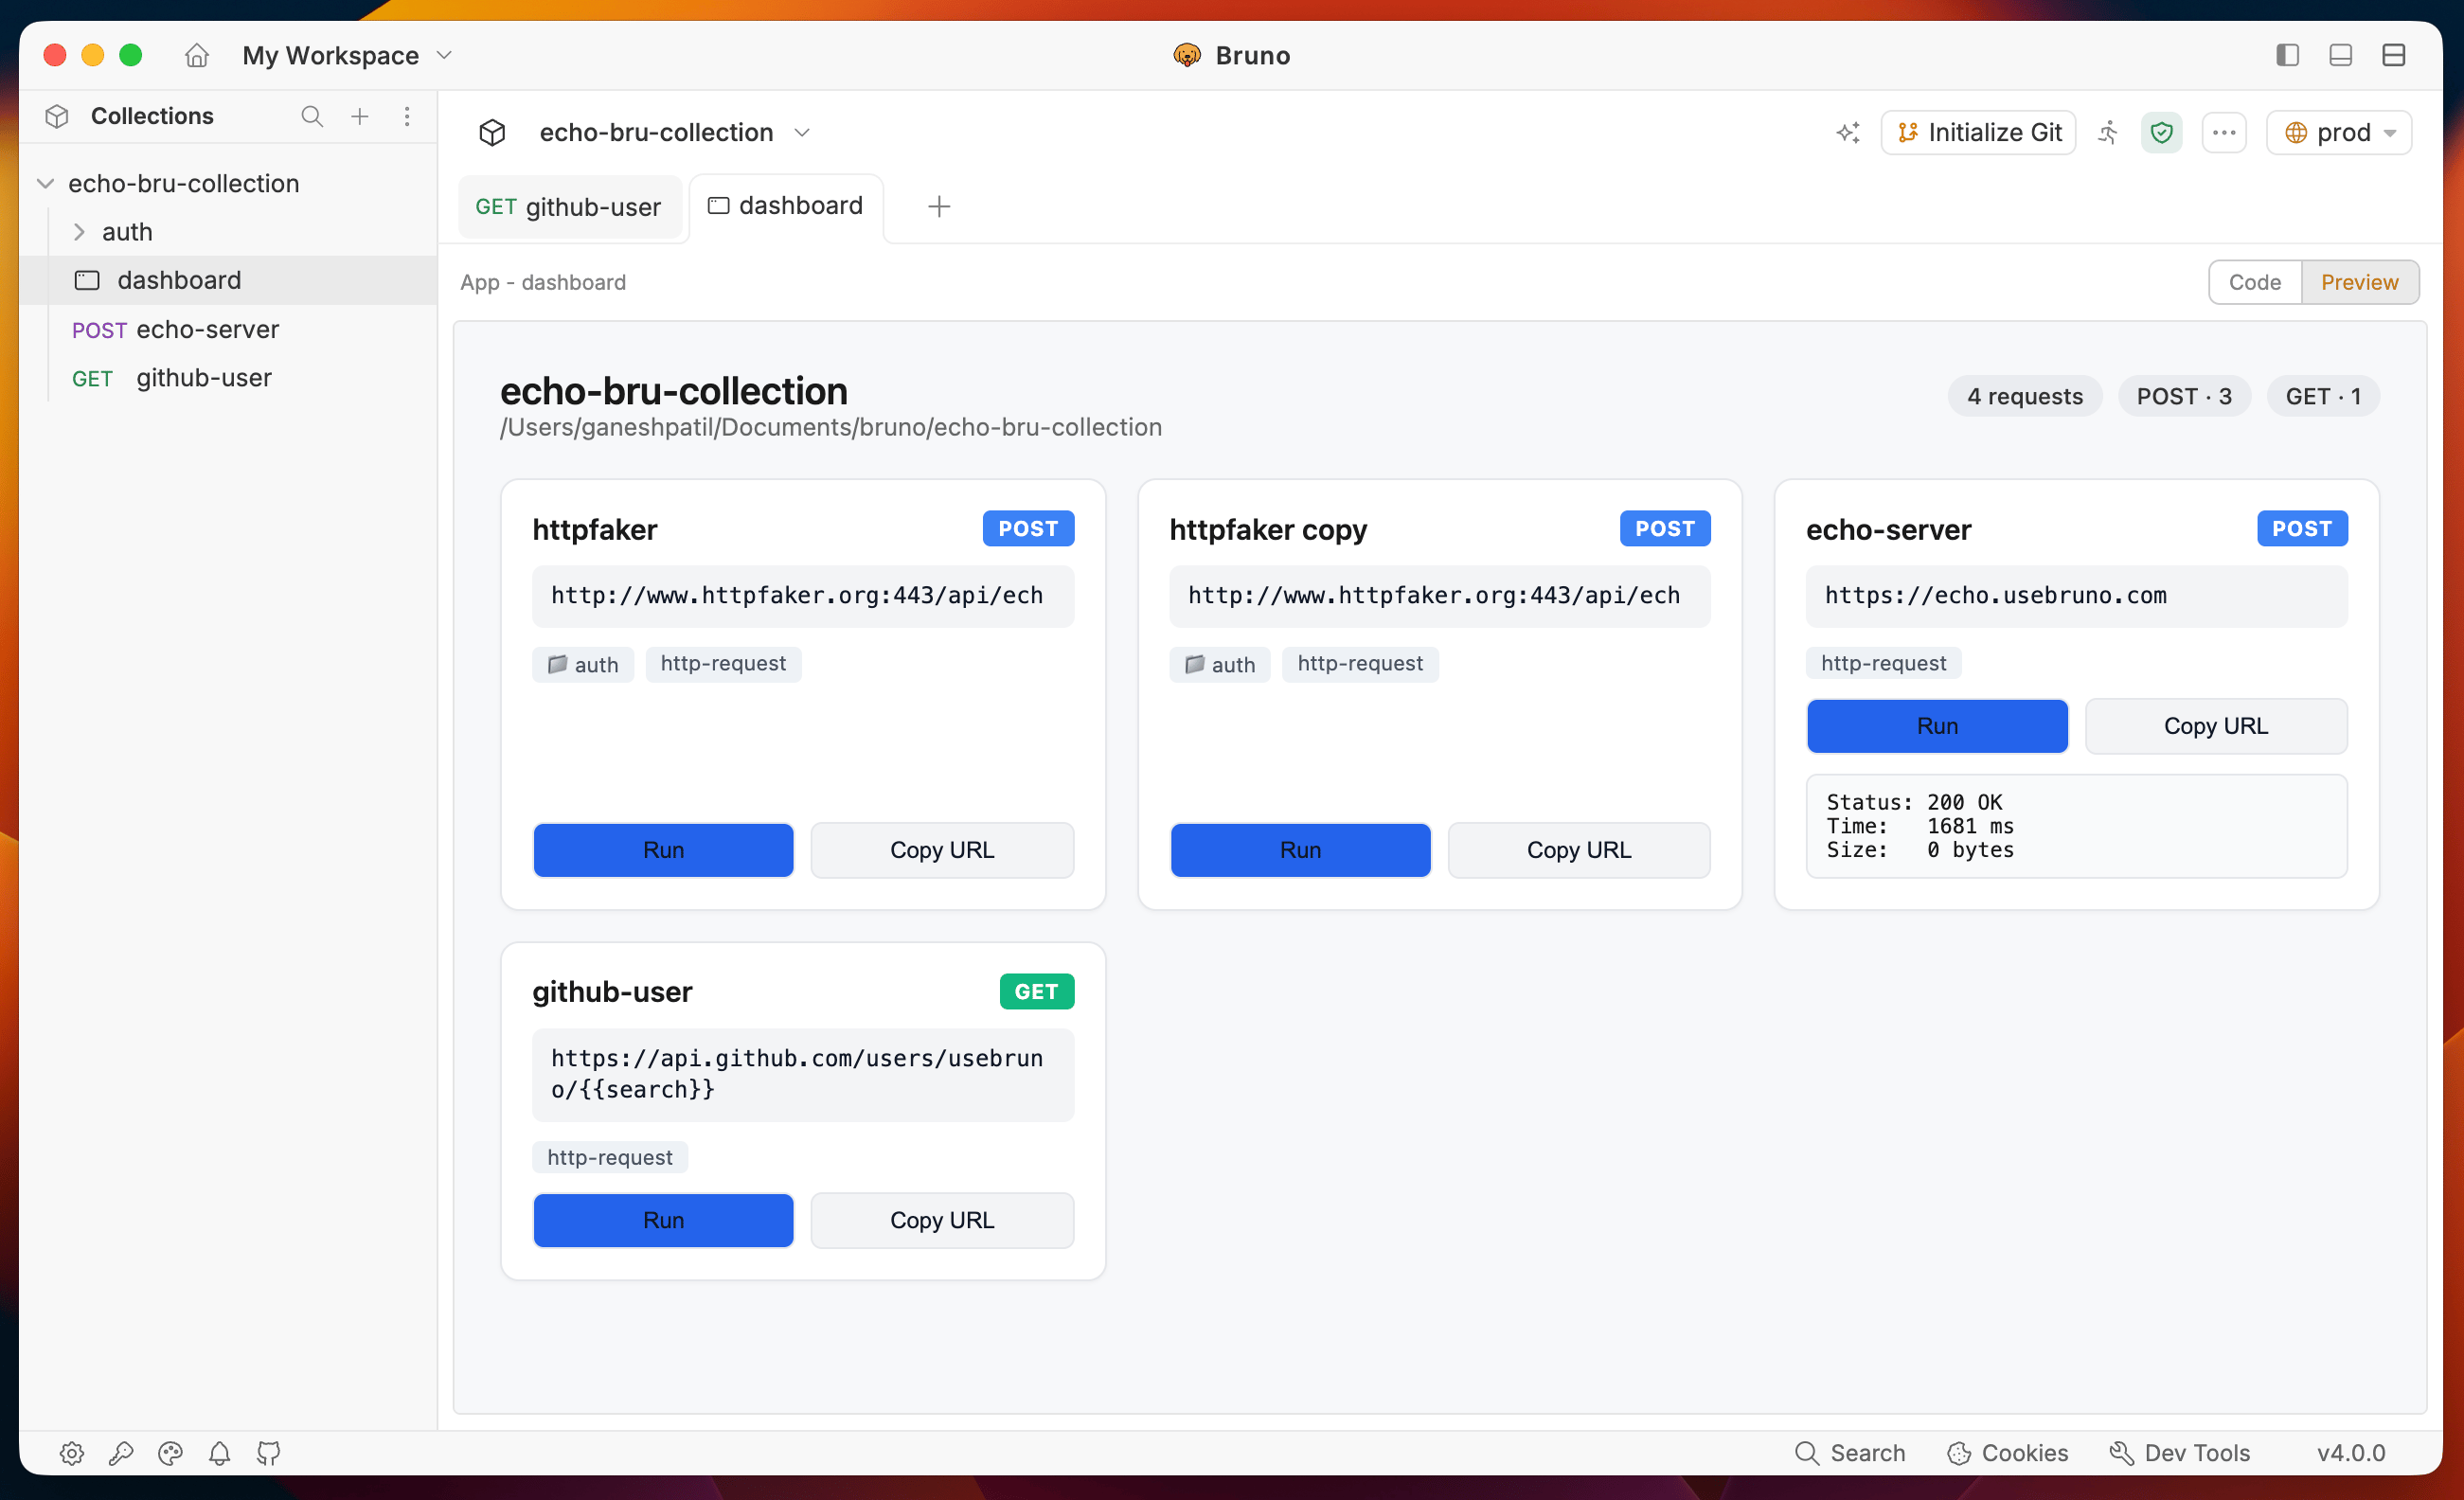
A collection-level App can see every request in your collection. The AI uses this full context to generate dashboards, workflow runners, and multi-step UIs that chain your requests together.
### How to generate
1. In the collection sidebar, right-click a collection or folder and choose **New App**.
***
## Collection-level App with AI
A collection-level App can see every request in your collection. The AI uses this full context to generate dashboards, workflow runners, and multi-step UIs that chain your requests together.
### How to generate
1. In the collection sidebar, right-click a collection or folder and choose **New App**.
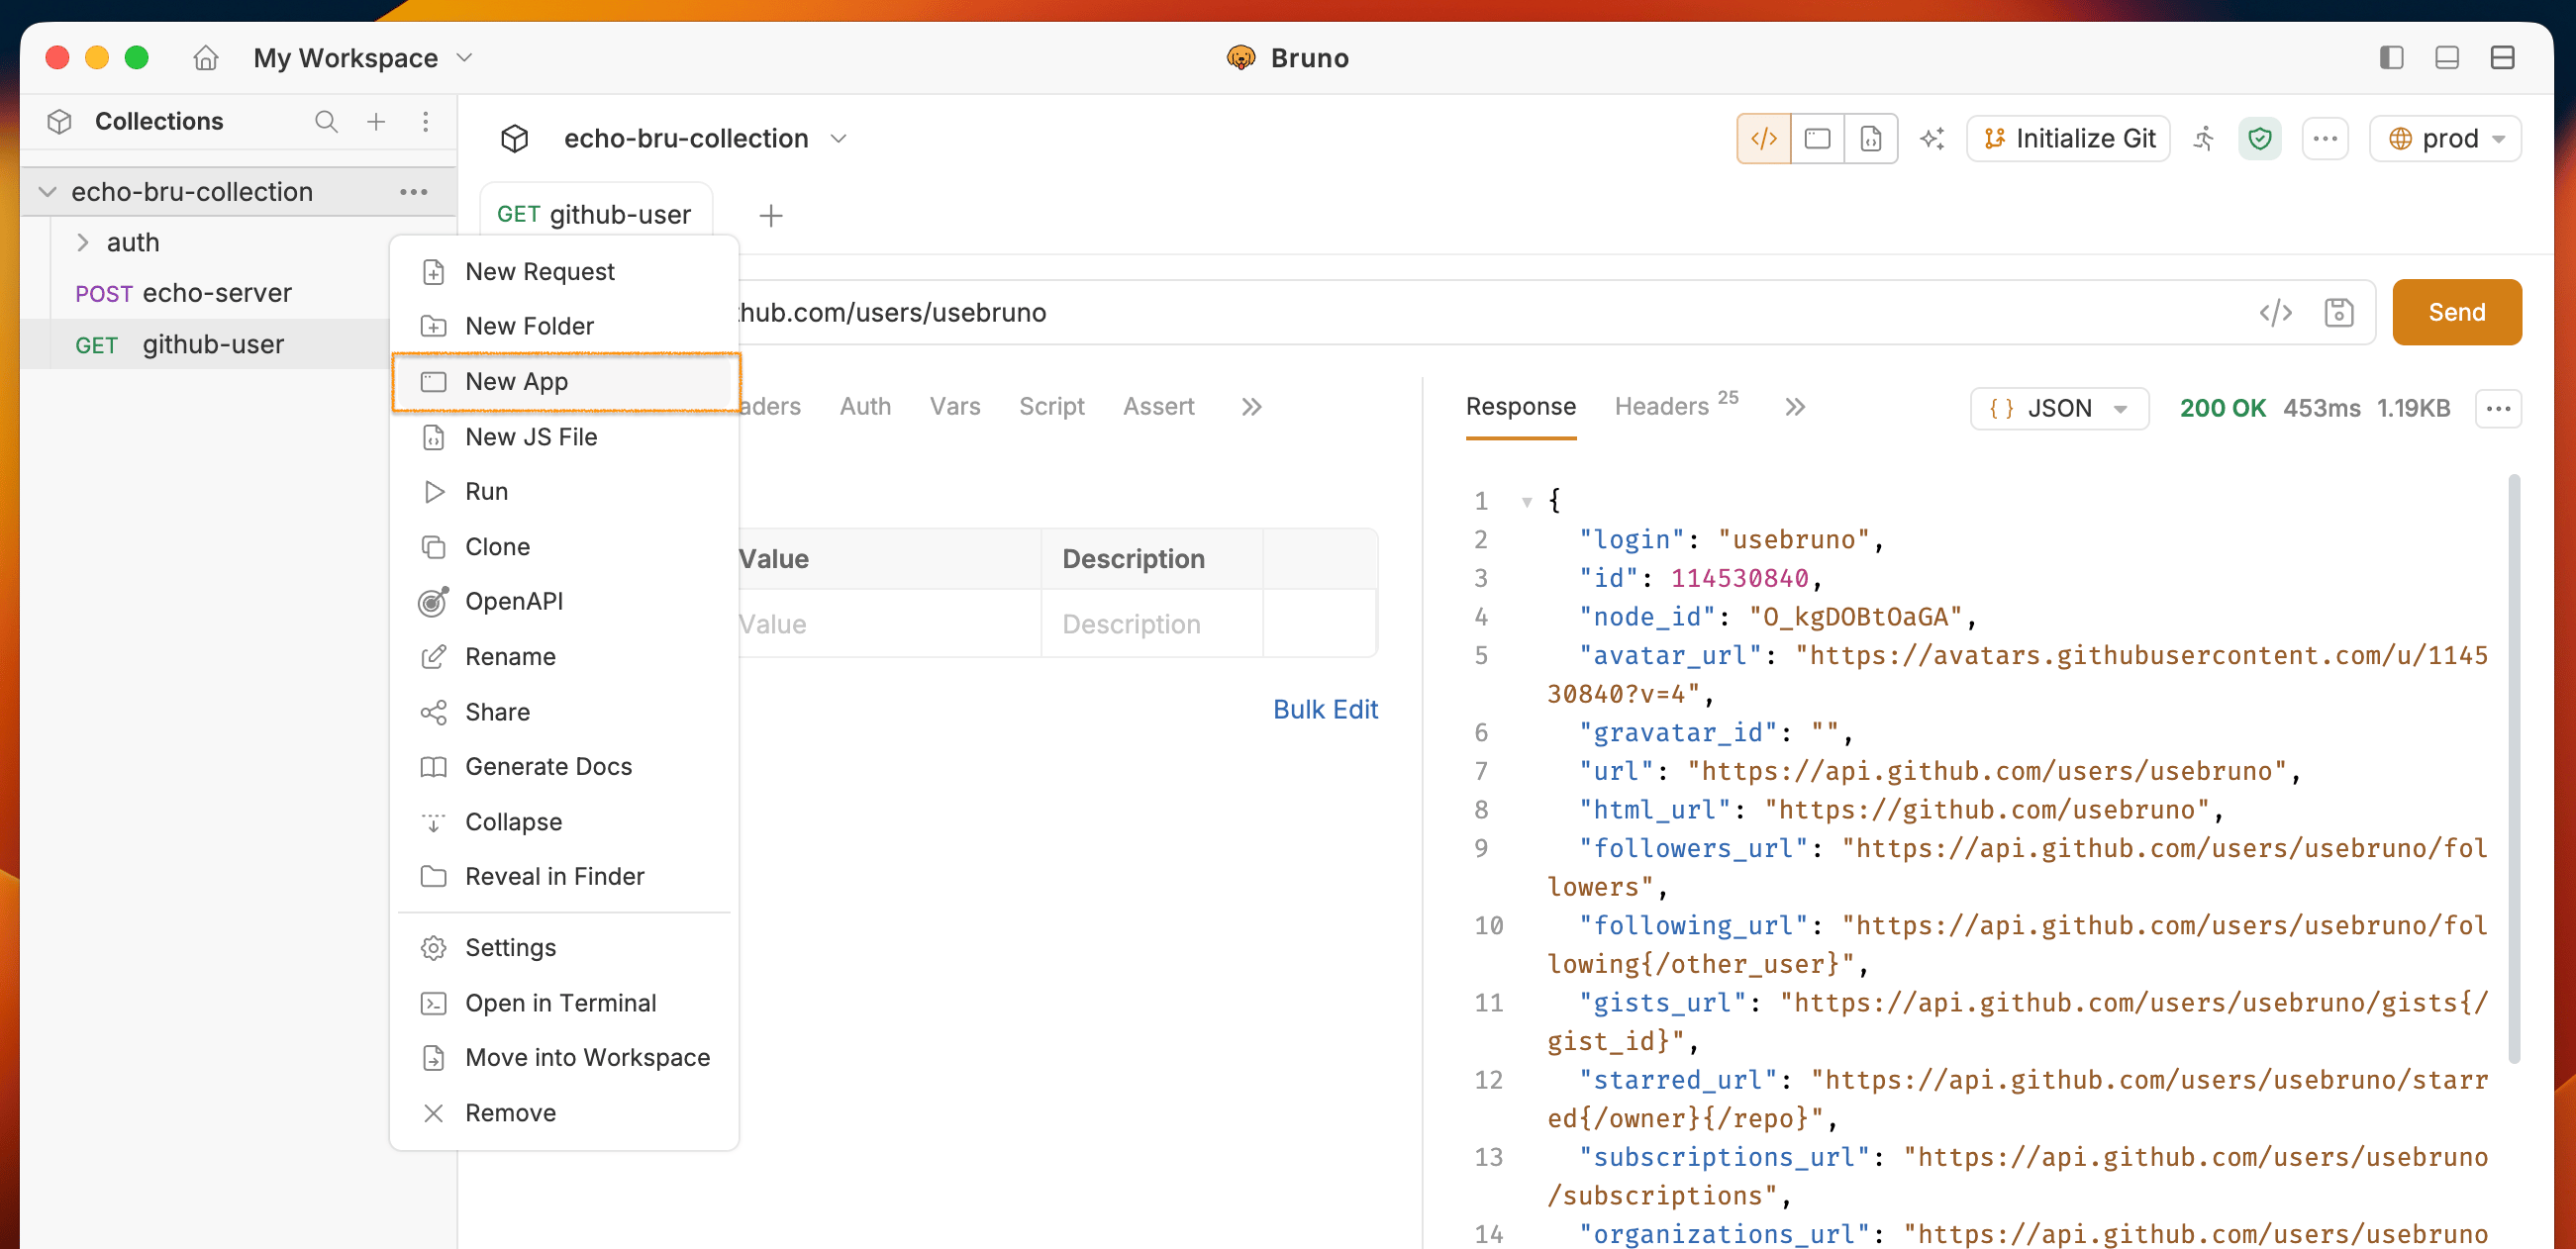 2. The dialog box will open, enter a name for the **App** and click on the **Create** button. A new editor tab opens with a blank App.
3. In the code editor, click the **star (✦) icon**. The AI prompt popup appears. Describe the App you want — for example:
* *"Build a dashboard that lists all requests and lets me run them one by one."*
* *"Create a login-then-fetch-user workflow: log in, store the token, then load the user profile."*
* *"Run all GET requests in the collection and show a pass/fail status for each."*
2. The dialog box will open, enter a name for the **App** and click on the **Create** button. A new editor tab opens with a blank App.
3. In the code editor, click the **star (✦) icon**. The AI prompt popup appears. Describe the App you want — for example:
* *"Build a dashboard that lists all requests and lets me run them one by one."*
* *"Create a login-then-fetch-user workflow: log in, store the token, then load the user profile."*
* *"Run all GET requests in the collection and show a pass/fail status for each."*
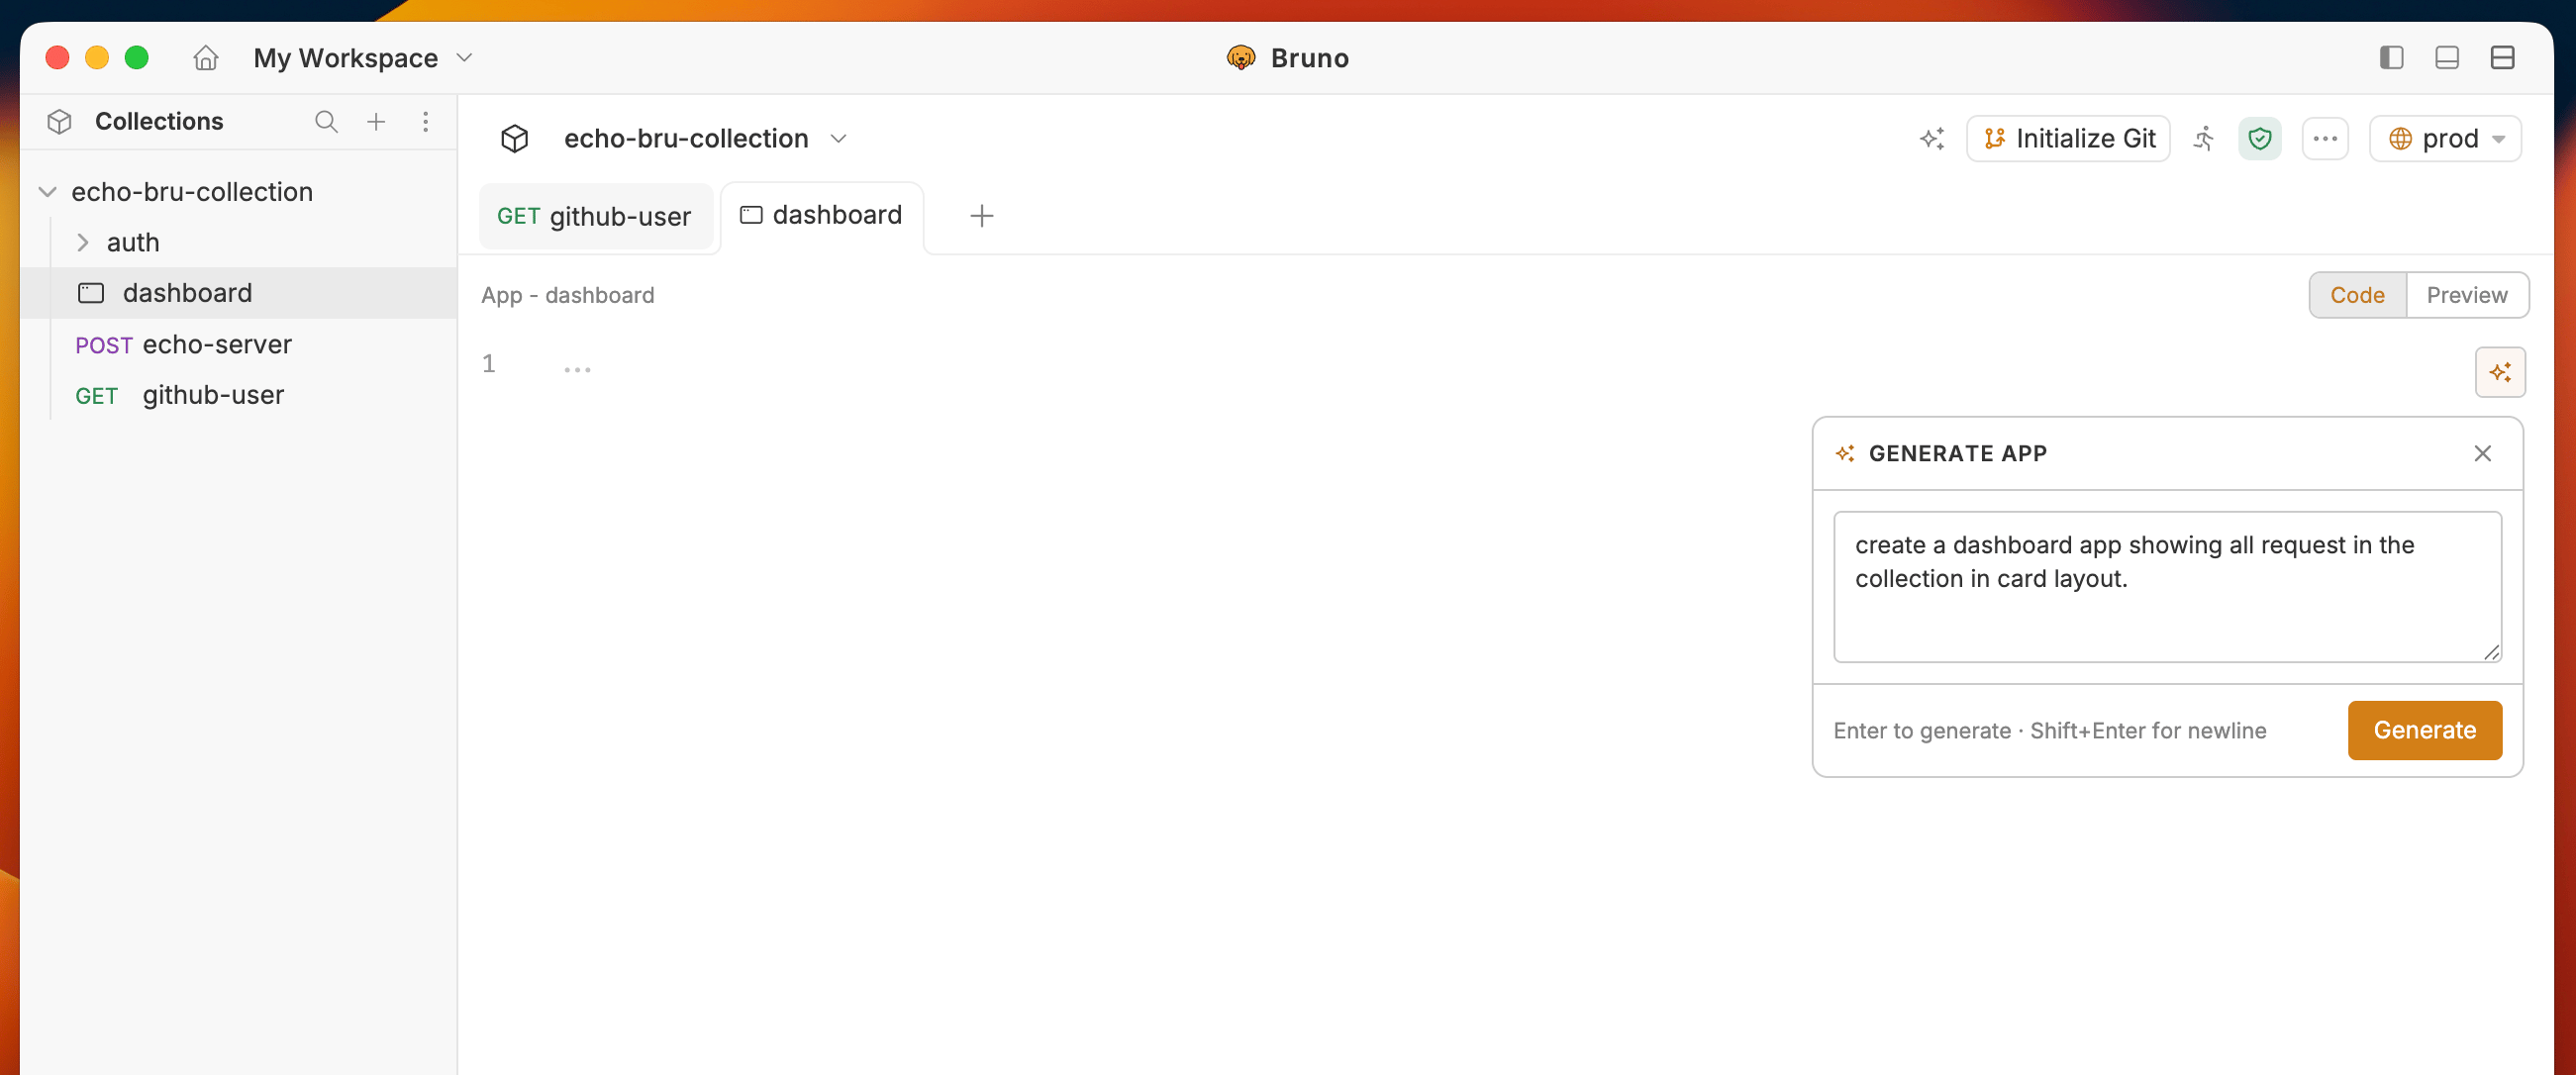 4. Bruno AI generates the App code using the names, methods, and paths of every request it can see in the collection. Click **Apply** to insert the code into the editor.
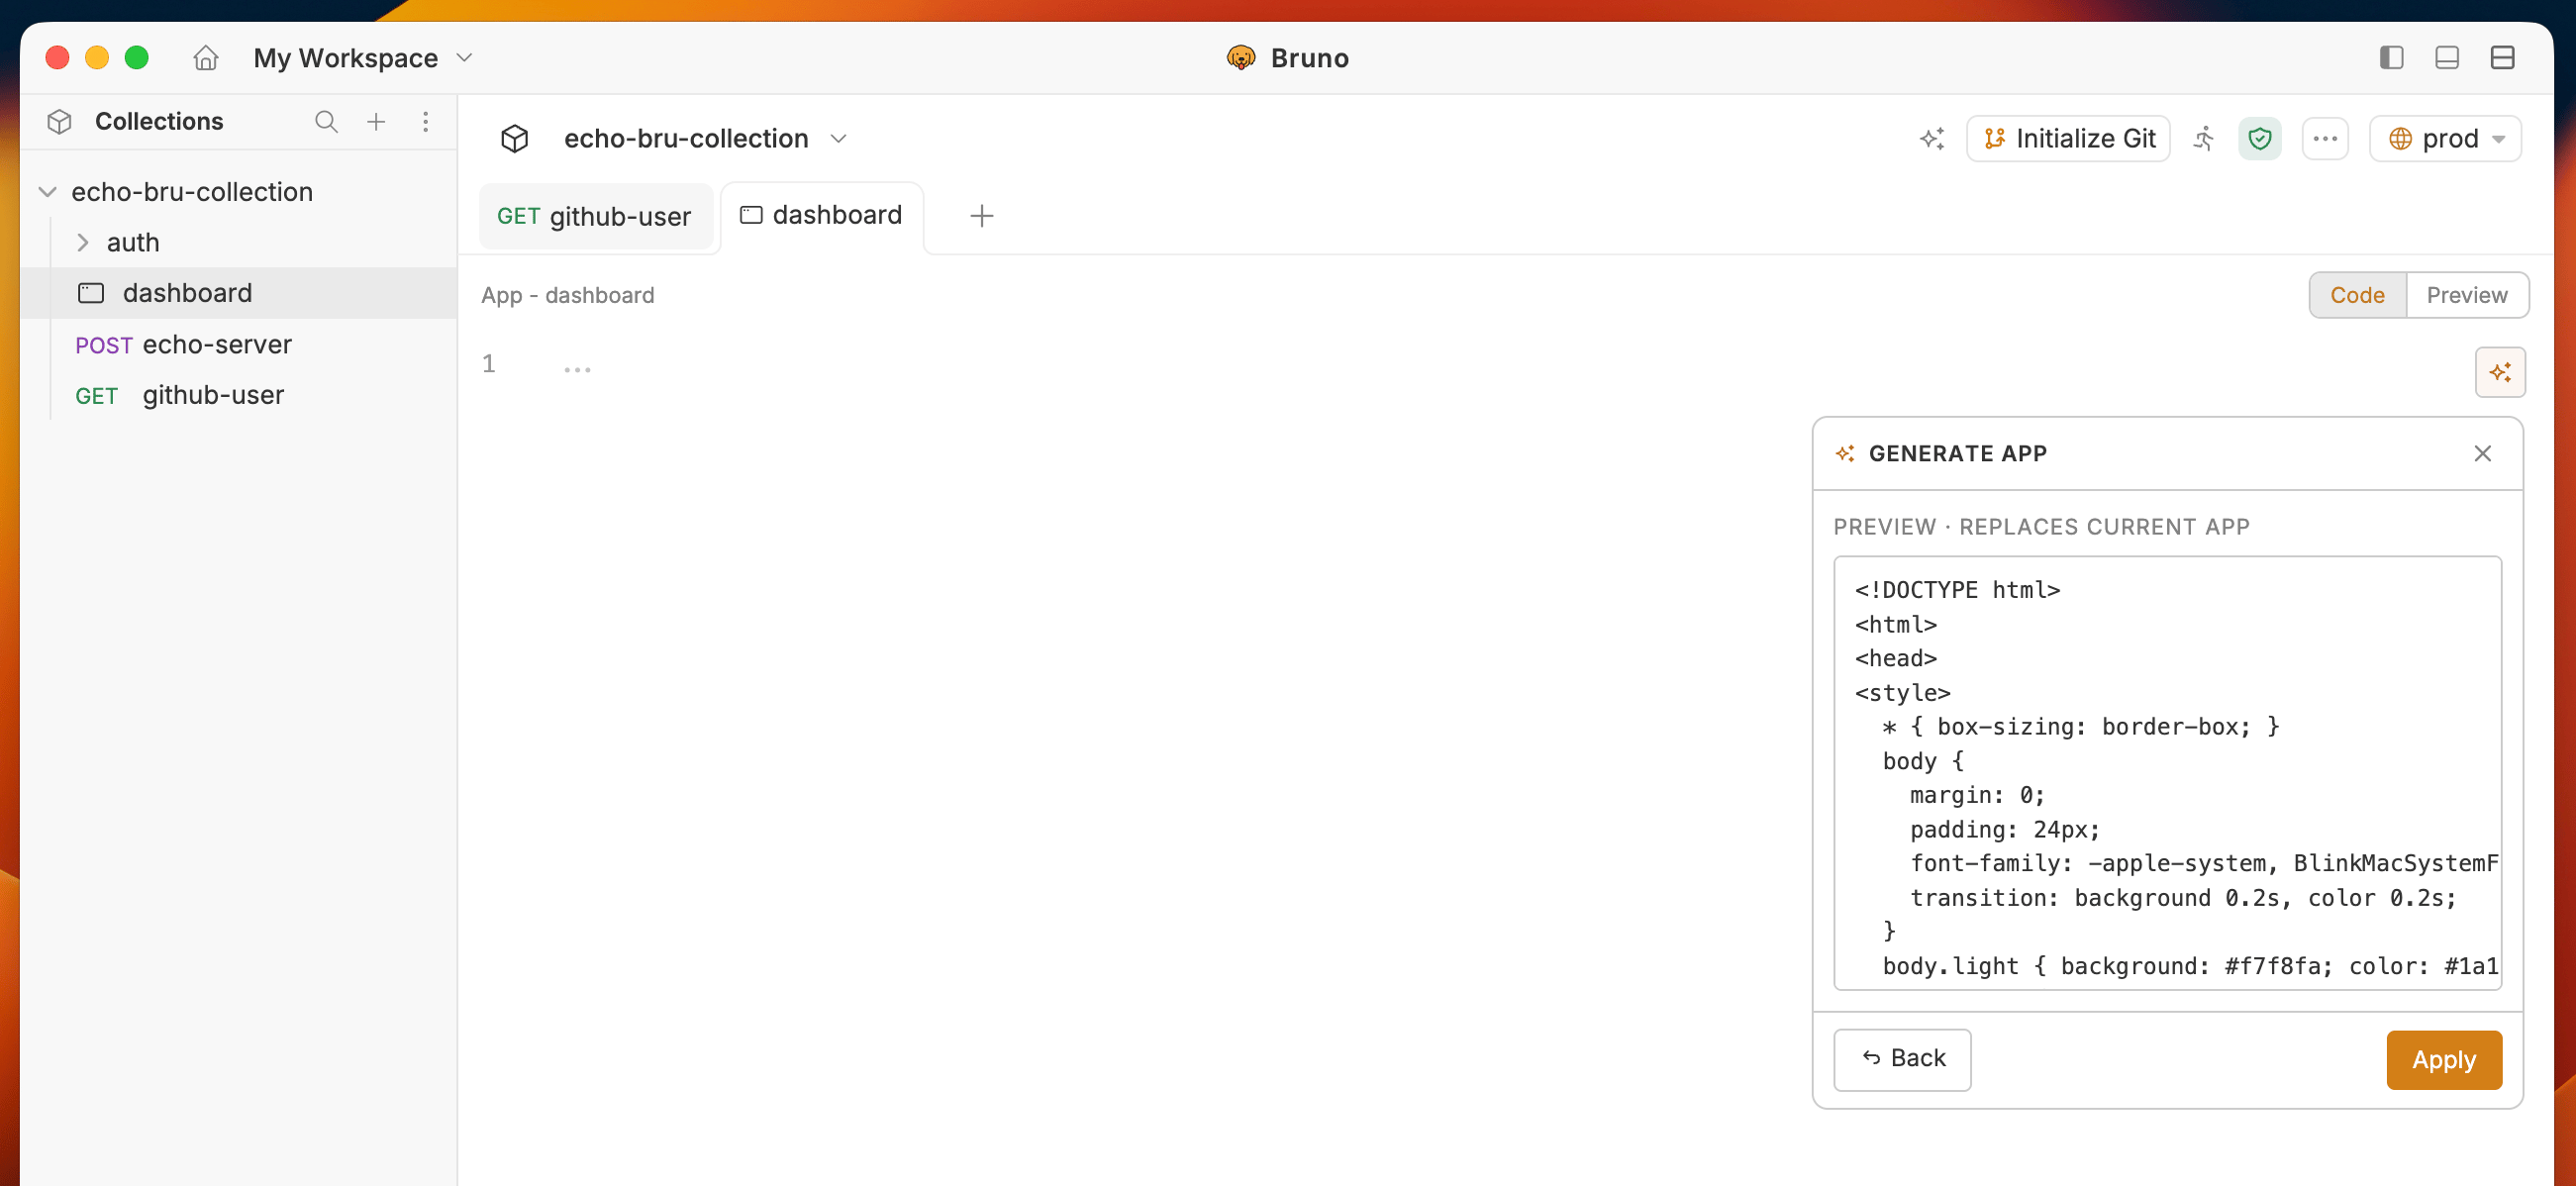 5. Click **Preview** to render the App in the sandbox and see the output.
 ***
## Tips
* **Be specific about the UI.** "A form with Email and Password inputs, a Login button, and a status message" gives better output than "a login form".
* **Mention what to do with the response.** "Display the `token` field from the response" is more precise than "show the result".
* **For collection Apps, name your requests clearly.** The AI uses request names as context - `Login`, `Get Orders`, `Create User` produces better output than `req1`, `req2`, `req3`.
* **Iterate.** Accept the first draft, preview it, then re-prompt with refinements: *"Add error handling for non-200 responses"* or *"Style it with Tailwind from a CDN"*.
***
## Tips
* **Be specific about the UI.** "A form with Email and Password inputs, a Login button, and a status message" gives better output than "a login form".
* **Mention what to do with the response.** "Display the `token` field from the response" is more precise than "show the result".
* **For collection Apps, name your requests clearly.** The AI uses request names as context - `Login`, `Get Orders`, `Create User` produces better output than `req1`, `req2`, `req3`.
* **Iterate.** Accept the first draft, preview it, then re-prompt with refinements: *"Add error handling for non-200 responses"* or *"Style it with Tailwind from a CDN"*.